Showing posts with label raven. Show all posts

Friday, April 11, 2025

Queen of Crows by Tracy Blackwolf

 Hello Everyone! Happy spring! Enjoy the blog card today~


I started by stamping the two images- bird and woman. Then I took my craft knife and cut out her hand and a good portion of her forearm. Leaving it attached at the outside edge. I wanted her to be able to hold her crow. I then cut out the crow.

I then painted her with distress spray stains.

While she dried, I got my card layers ready. I stamped the birds on a wire on the piece she was going on, and then stamped the tree several times. The card is almost like a fabric. its very shimmery.

I then layered it onto a larger layer before laying onto my card. it also has sparkles in it. For the crows eye, I used a fishing lure 3D sticker. For the lady's crown I used a small piece of Dresden trim.

I used foam tape on her upper body and double stick tape for the lower. the crow also has foam tape. Its quite dimensional too bad it doesn't translate on the computer.
And that is it! 

Stamps used:
Weathered tree    19467
Birds on a wire    13039
Beautiful retro lady looking up    8280
Raven   1904

Other supplies:
Dresden trim- crown
Distress spray stain:  Tattered rose, Victorian velvet, tea dye, twisted citron, cracked pistachio, saltwater taffy
Black memories ink


Thursday, September 24, 2020

Enchanted - Quick bookmarks

 Hey everyone,

Today I'm sharing two bookmarks with you. No fancy techniques this time, even no coloring, just a little stamping to fill up my lunch break while I was working from home.


I must admit that I have been a little uncreative over the last month. Such more simple projects help me getting back to the crafting table. So if your muse went on vacation, this might be a way to get back into your creative flow.


Here's how I made the bookmarks:

I cut the two pieces of paper to a size of 7 x 2.5 inch and used a small corner chomper. For bookmarks I prefer having round corners. Then I stamped the goddess on one and the raven on the other tag, using Versafine Clair ink. The next stamp I used was the "enchanted" lettering along with a multi-colored embossing powder. This creates some nice interest on the bookmarks as it contrasts the other more neutral colors I used.

For a little visual texture I grabbed the lace background stamp as well as a writing stamp from the same plate. Fun fact: When I stamped the lace I was really dissatisfied with the look - lucky that changed once I added the other stamp over it.

I added some ink to the edges and some mettalic thread to the top and that's it.


Here are some more detail photos of the two bookmarks:


Stamps used:
Raven Looking Up (20269)
Whimsical Tree Lady Nude (19681)

Lace Background (19298)
French Writing Background (19297)

Enchanted (18823)


Other supplies:
- left over paper (watercolor paper, kraft cardstock)
- corner chomper
- Versafine Clair ink (nocturne)
- Versamark ink
- Archival ink (pebble beach, watering can)
- WOW! embossing powder - Seth Apter "space dust"
- thread or ribbon


Hope you like my project, even if it is such a simple one.

See you soon


Wednesday, October 31, 2018

The Cat | Sue Plumb


Happy Halloween everyone!
Sue Plumb here with my latest design team project for you. In keeping with the Hallowen spirit, today I have a creepy mixed media scrapbook layout to share using some of the recently released Halloween stamps and a snap of our family cat. Unfortunately our furry boy has a bit of a reputation for giving my daughter a scratch or a nip, so I made this page especially for her. (She instantly proclaimed it to be her favourite page I have ever made and it is already framed and up in her room! haha)


I went with a different size for this layout - opting for an 8.5x11" size page, instead of the usual 12x12" I usually create. I started with a piece of white cardstock, and added some Dina Wakley acrylic paints to the background. First 'Elephant', followed by 'Umber', 'Black' and then 'Cheddar'. I alternated between using a brush and brayer to apply the layers; finishing off with 'Buff' applied to the area where my photo was going to go.


Once the paint was dry it was time to add some stamping! I began with the Cross Marks Background, stamping it randomly around my page using Staz On ink. I also added some larger marks using the Carved Xs stamp.


Once I had the marks down on the background, I added some feature images - the new Raven Looking Up in the bottom right corner; and the Ext Witch Hazel label a few times around the page. I also added the Beware Of: list, using the Set of Vampire Teeth to frame it at the top and bottom.


I couldn't create a page like this without any "blood", right?! I used Colour Blast 'Sunburnt' Colour Artist Ink and applied it by dripping it onto the page using the dropper, and also by splattering it using a small brush.


I then added my photo (I had pre-cut around the silhouette and attached some cardboard to the back); adding a small paper doily and some frayed gauze underneath it before securing it to the page. I altered my photo to give it some extra "creepiness" by rubbing a little red paint around his eyes and using a fine tip white Sharpie to white out his eyes.


I used a handmade DIY chevron embellishment from Charms Creations and altered it by stamping directly onto the fabric using the Row of Distressed Lines stamp. I then attached it to my page using Helmar 450 adhesive.


I stamped the May Contain Human Flesh quote onto some white cardstock, then fussy cut around it and stuck some cardboard underneath to pop it up from the background.


To complete my "list" and also to provide a title for my page, I added the words the cat using some old Sassafras Lass alpha stickers.


Thanks so much for stopping by today, I hope I have inspired you to get inky and create something creepy too!


Stamps used:
Cross Marks Background
Carved Xs
Raven Looking Up
Ext Witch Hazel
Beware Of:
Set of Vampire Teeth
Row of Distressed Lines
May Contain Human Flesh

Other materials:
- cardstock
- Dina Wakley acrylic paints (Elephant, Umber, Black, Cheddar, Buff)
- Tsukineko Staz On ink
- Colour Blast Colour Artist Ink (Sunburnt)
- fine tip white Sharpie
- paper doily, gauze
- Miracle Tape
- Charms Creations chevron
- Helmar 450 adhesive

Friday, September 07, 2018

Don't Blink | September Challenge Inspiration | Sue Plumb


Hi everyone!
It's Sue Plumb here to share my latest design team project with you. Today I am sharing a piece I created recently that was inspired by this month's awesome "For the Birds" challenge. It also showcases one of the amazing new release stamps, which I couldn't wait to use!

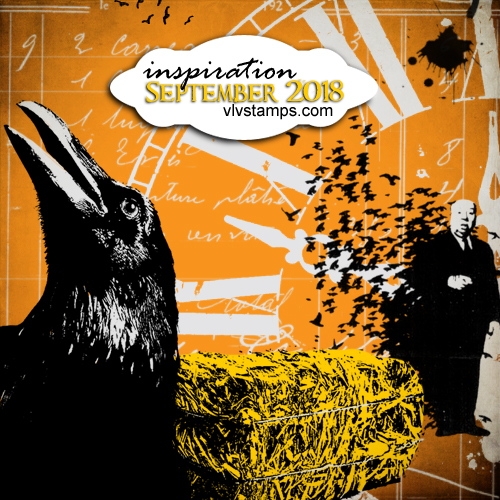
Here's a look at this month's challenge inspiration...


One of my arty friends has been using index cards a lot lately, and I was inspired by the pieces she has been creating to use an index card for my project. (One of the good things about index cards, is that they are almost exactly the same size as a standard photo, so they fit nicely into 6x4" photo frames!)

Here is my card inspired by the challenge...

To begin my project, I used some gel matt medium to adhere some book paper onto the index card. I then applied heavy white gesso using a brush. I chose to use a brush as I wanted the texture of the brush strokes to show through; but in hindsight, next time I will go a little thinner with the gesso so the text is more visible on the finished piece.


After the background was prepared; I used black Staz On ink and the new Raven Looking Up stamp as the focal image of my piece. I then added some tree branches across the top and bottom of the card using the Branch Antlers stamps. I also inked around the edges of my card.


Next, it was time for some colour! I wanted my piece to have an eerie feel, so I opted for green as the main colour. I used Faber-Castell gelatos to scribble gently onto the card, then used a baby wipe to blend the colour out.


I started with the darkest shade around the edges of the card, moving towards lighter shades in the middle. In the centre of the card I used a yellow, blended with a small amount of green; and along the edge of the raven's silhouette I also added a small amount of orange.


Once the colour was complete, it was time to add some text. I used the recently released That Look of Otherness stamp and combined it with Don't Blink to form my focal quote. I stamped each of them out on some scrap white cardstock, then used the orange gelato and a baby wipe for blending to add a small amount of colour over the top.


I then cut the words out and inked the edges of each piece with black ink. To add some texture to my project, I added some messy white cotton thread before sticking the pieces of the quote down.


To finish off, I used Colour Blast 'Soot' Colour Artist Ink and a small brush to add some fine splatters randomly around the card.

Thanks for stopping by so I could share this with you.
Don't forget to enter this month's challenge for your chance to win some new rubber and a feature spotlight on the Viva Las VegaStamps blog. (Link your entries HERE)
I hope I have inspired you to get inky too!


Stamps used:

Other materials:
- Index card
- Book paper
- Mont Marte gel matt medium
- Colour Blast white heavy gesso
- Tsukineko Staz On ink
- Faber-Castell gelatos
- Colour Blast 'Soot' Colour Artist Ink
- Baby wipes (for blending)
- White cotton thread
- Liquid adhesive


Saturday, September 01, 2018

For The Birds - September CHALLENGE

Hello HELLOOOOOO

Finally .. a month I can say WELCOME TO THE COOLER WEATHER :)

It's time for September's challenge, and it is a FUN one. If I do say so myself, anyways!


BRING ON THE BIRDS!

Everything bird related, crows, raves, pigeons, swallows... bring 'em on. Alfred and his bird freakiness, maybe a little Poe... whatever strikes your fancy BIRD wise. Also be inspired by oranges & yellows for the fall season, black & white as accents, and any cool vintage/fall imagery like clocks, invoices, handwriting, hay. You know :) the good stuff!

Don't forget the rules:
-Create a new project based on our inspiration board (it has to be posted this month, but you can certainly link up to other challenges as well!)
-Use at least one (but certainly more if you want) Viva Las VegaStamps! rubber stamps
(We are now allowing competitors stamps to be on your work, but please make VLVS! the focus of the project, thank you.)
-Post it to your blog with a link back to us
-Upload to our linky using your direct blog post link (You may also upload via facebook, flickr or other gallery)
You could win a Project Spotlight post on our blog + some new rubber of course.
And visit us back here for inspiration!


Thursday, June 01, 2017

June Challenge - Flock o' Birds

It's time for a new monthly challenge -- and we're bringing on the PINK.


Be inspired by words like ... coral, pink, creamsicle, orange, spots, dots, birds, bird cages, FLOCKS of birds, text, numbers, invoices, crows, grunge, distressed, tan, gray, white and anything else you find inspiring from this graphic!


Don't forget the rules:
-Create a new project based on our inspiration board (it has to be posted this month, but you can certainly link up to other challenges as well!)
-Use at least one (but certainly more if you want) Viva Las VegaStamps! rubber stamps
(We are now allowing competitors stamps to be on your work, but please make VLVS! the focus of the project, thank you.)
-Post it to your blog with a link back to us
-Upload to our linky using your direct blog post link (You may also upload via facebook, flickr or other gallery)
You could win a Project Spotlight post on our blog + some new rubber of course.
And visit us back here for inspiration!


Saturday, October 27, 2012

Quote the Raven Nevermore

Hello again. I'm back with another Halloween journal page for you.

Back in Sept. Retro cafe art gallery on their facebook page posted a free Halloween collage sheet, and of course a challenge. To use at least one item from the collage in your art piece. I did a journal page in my little Straphmore Visual Mix Media art journal.  chose to use 3 of the collage images and of Course a couple of VLVS! stamps! :)


I printed the collage sheet and right then cut out the Poe image. I did a gel medium transfer with it. After i cut the image out. i put some good amount of Gel Medium on the picture. I then placed it on the Journal page. I burnished it to make sure I get a good transfer. Or as close as a good transfer I can get. these transfers can be  little temperamental. After sitting on the page for a few seconds, I lifted the picture off. 


as you can see I got a pretty good transfer. Though he is missing part of his stash.:P After it dried i painted the page with purple water color paint.I used some Screamin Banchee Black Lindy's stamp gang starburst spray with some punchenllia and some Golden Doubloons Moon shadow mist. 

I then cut out the raven and wings from the collage sheet. I glued the raven down with the gel medium since I still had it by me. When that was drying I stamped the Wheel lady on white cardstock. Colored her with markers. Cut her out and then glued the wings to her.Before glueing her down. I put some drips of water down craft paint. Was trying to get a dark look to the page. I then stamped "Nevermore" on a piece white cardstock Sponged Seedless Preserves Distress ink on it, Cut it out and glued it on the page. For the title I wrote the it on a scrap of black cardstock with a silver pen. Last step I distressed the edges of the page and used black soot distress ink pad.


Stamps used

Items used
Straphmore Visual Journal Mix media
Retro art Cafe art gallery Collage sheet
Artist Loft Water Colors
Punchenllia
Water down black craft paint
sprays
gel medium
markers
Black card stock
silver gel pen

Sunday, October 07, 2012

My Poe-st (pun intended)

I was introduced to Edgar AllanPoe and The Raven in Junior High School. I still remember how we acted out the poem in class. Naturally, I was the star - the Raven. I only had one line but it was the most important of the entire poem, “Nevermore.” I didn’t receive a standing ovation for my performance but a few classmates applauded, and for a moment in time I actually considered acting as a career path.

I still love the unparalleled literary master of the macabre. Poe believed that visual art should not make a clear statement, but rather suggest and evoke emotions and stimulate the mind. I hope my interpretation of The Raven does just that.
After leaving his home in China, Mr. Crow aka Mr.Raven flew to my local Dollar Tree. He is now residing on a slightly crushed eye-medicine box that I retrieved from the Friday garbage.

I don't find it a bit odd that Mr.Raven is wearing a party hat with a
purple pom-pom. Do you?

SUPPLIES
Black Bird
Recycled Box
Scrapbook Paper
Page from an Old Book
Pom-Pom
Ribbon or Paper Trim for hat/scarf
4 Wooden Feet
Glue Gun
Stickles
Moss
Chipboard Clock
Black Ink

VLVS
NEVERMORE STAMP
MIRACLE TAPE
I kept this craft simple because I wanted to highlight the ornate Nevermore stamp from Viva Las Vegas Stamps. The whole project took around an hour and was easy peasy.

DIRECTIONS
1. Cut scrapbook paper to fit box and using Miracle Tape attach to bottom, top and sides of the box.
2. Cover the 4 wooden feet with Stickles. When dry attach to bottom of the box using your glue gun.
3. Make hat for Mr. Raven by rolling up book paper and attach trim and a pom-pom. Dress Mr. Raven in his hat and scarf using Miracle Tape. Bling optional.
5. Attach Mr. Raven to box and then cover the empty area of the top of the box with Miracle Tape. Cover with moss.
6. Make a banner out of plain paper and stamp NEVERMORE. Attach to box. Add your chipboard clock.
7. Mr. Raven is ready to party!!

Poe died on October 7, 1849 at the age of forty. It seems fitting that the cause of Poe’s death remains a mystery. Your thoughts on Edgar Allan Poe? Or Halloween Parties?

Wednesday, October 03, 2012

A Journal page layout hybrid.. Photo Booth

DeeDee filling in today and here is a journal page/scrapbook layout I did to preserve the fun memory of my husband and I taking our little guy into a photo booth:


The Faded Raven (2.75x2.25 - $9.50)and Crown (2x2.5 - $7.25) really made this piece!!
The raven was stamped in Archival Black by ranger on the journal page, but the crown was stamped with archival on Kromecote and fussy cut to attach to the corner of the photo.


The brad is BasicGrey, the Webbing and Burlap string are May Arts, the mist is glimmer mist. I also used floral beads, a dymo label maker, a black pen, and gesso.