Showing posts with label paper. Show all posts

Friday, October 22, 2021

Notebook by Arwen

 Hi Lovelies ❤

Today, I wanna show you my newest project.

I built a notebook with black and lots of purple 💜💜💜

And of course, I' ll have an instruction for you.

But first - the finished book:


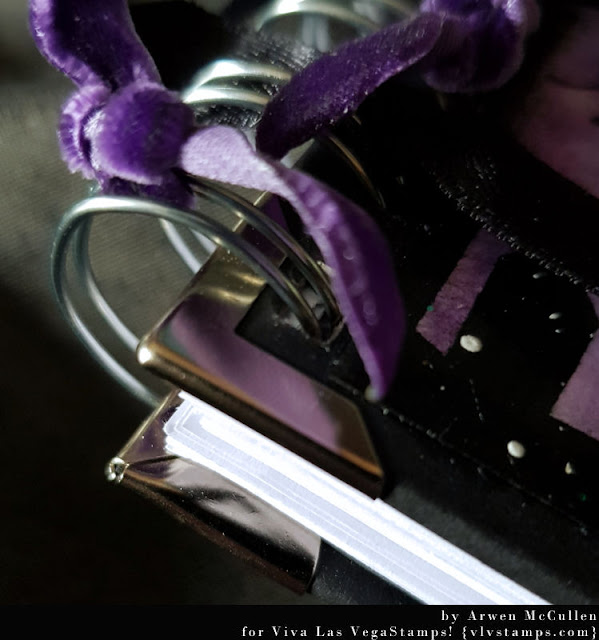
Close-ups:


   And this is, how I made it:

1.) I used cardboard and paper and cut it into the right size.

2 pieces of cardboard for the book cover and 80 sheets of paper.


2.) After cutting all the pages and the cardboard pieces, I used black paper to wrap the book covers.


3.) For the back of my book cover, I used a ribbon as a bookmark.

I placed it, in the middle of the top and glued a few cm.


4.) Time to finish the book covers, glueing in the right sized paper on the inside.


5.) Ok, let's put the single pieces together :)

I punched all the pages and the book cover with the Bind-it-all.

I also used book corners to protect the corners from wear and tear.


6.) The book blank is ready. Now it can be designed.


7.) I use a suitable piece of watercolor paper for the front of my book cover.

 Now the best part of any project - choosing the stamps.


8.) Let's bring some color onto this page. Result -  at the top of this posting 😺


All stamps I used:

- The moon

- Realistic skull

- Cemetery

- Raven in witch hat

- Bat

- Spider

- Scrabble Alphabet small

- Stay creepy

- The end is near


Other stuff:

- Cardboard

- Paper

- Black paper

- Staz on

- Distress Reinker

- Zutter Bind-it-all

- Binding wire

- Book corners

- Ribbons

- Canson watercolor paper

- Varnish


Ok, that's all. Hope you like it ❤

See ya soon


Thursday, September 18, 2014

Family Love Vintage Style Collage


Greetings stampers! It's Amy blogging today, to share a vintage style collaged canvas. I have 7 different Viva Las VegaStamps! on this canvas, and I think they all work so well together.

  I started by prepping a 12x12 canvas board with...of all things, a sample of Benjamin Moore blue paint I picked up at the hardware store for $1. I then layered on vintage style papers, layering them on with Mod Podge. When this had dried, I added layers of mists in light browns, and spread them on with a brayer. A layer of white acrylic paint was the final of the canvas layers. 
The fourth layer on this canvas is the background stamping, where I used the checkerboard and cursive writing stamps randomly all over. I kept the harlequin diamond stamping just over the area where my photo cluster would be. 
 After layering on vintage papers and elements, I stamped the Bee Cards, Paintbrushes in Jar, and Pen Tips onto untextured cardstock, and fussy cut them out. Adding them throughout the clustered area of the collage, gave the perfect unique vintage touch.


 The Directional Wheel stamp added a perfect bit of movement on the bottom and top corners of my layered cluster. I love the look and how it blends seamlessly with the style of the piece.

I'm really excited with how this canvas turned out, and I hope you enjoyed seeing it too! I hope you have a creative rest of the week! <3

Supply List:
Viva Las VegaStamps!:
Backgrounds: checkerboard, cursive writing, Harlequin Diamond.
Other: Bee Cards, Paint Brushes in Jar, Pen Tips, Directional Wheel.

Canvas board
Ink: IMAGINE Crafts, Ranger
Paint: Benjamin Moore,Plaid Crafts
Mist: 13 Arts, Tattered Angels
Paper: Tim Holtz, 7 Dots Studio, Vintage
Metals: Prima, Bead Landing, Vintage
Photograph: The Sparkling Gnome

Tuesday, April 29, 2014

Vintage Art Journal Spread

Hi Stampers! DeeDee here again, today. This time sharing a project of my own, using a splattering of old and new stamps!

Did you see this post on Saturday talking about the new Art Journaling classes we're doing? Well I've been wanting to really fill up my new journal with all types of pages.. and so today I have a double spread to share, that really is just sort of all my favorite techniques and styles. 


The page base is a sheet of Nature Walk from 7 Dots Studio, with layers of stamping and gesso, coffee, distress ink and more. 


Up in the top right corner I stamped the Cracked Background in Memento gray flannel. I have tons of ink pads in different colors, but it's tough for me to break out of stamping black. I found this gray was a nice subtle alternative, without losing interest in the rubber stamped image. You can also see, in the very corner, where I stamped the Writing Background in archival ink. At this point I did find it to be a bit heavy for the vintage feel of the page, and so I covered it up a bit with gesso, just letting the stamp peek through. 


Below this tag you can see some more stamping in gray, this time the Color Wheel Lines. Notice in the top left corner... that's the brand new Waybill / Invoice background. It's been stamped in Versafine Toffee and whitewashed with a thin layer of gesso. It helps lighten the stamped image allowing it to blend in a bit to the background. Handy when you don't have a lighter colored ink pad.


On the left hand corner is the new Butterfly Specimens stamp in a nice heavy black Archival ink. It helps balance out the spread. 


And one last final photo here.. I snuck in the 23.24.25 tape measure stamp from Plate1430. It's been stamped in that same gray used earlier in the page. 

There's tons of media mixing going on here, including ink types (Archival by Ranger, Memento, Versafine,) mists (Tattered Angels mixed with coffee,) coffee stain (Which I totally picked up from this post by Natasha, SO COOL,) gesso, patterned paper (7 Dots Studio,) Golden Gel Medium, Tim Holtz tissue tape, Prima flowers, My Minds Eye brads, UmWowStudio chipboard, 7 Dots Studio and Sizzix die cuts, and more. 

Tuesday, June 18, 2013

Accordion Fold Card


 For my last project I'll be sharing a card using the brick, windmill and saying images from VLVS. I hope you enjoy this tutorial making my accordion fold card.

Accordion Fold Card


Supplies
http://www.vlvstamps.com/windmill-scene-3-1-2-x-4-1-2.html

http://www.vlvstamps.com/brick-background-2-1-4-x-5.html

http://www.vlvstamps.com/destination-unknown-1-x-2.html

1/2" Miracle Tape

Miracle Sheets

Kromecote Glossy Card Stock


Other supplies listed below

Cut 6 1/4 x 5 1/2" designer paper. Use Martha Stewart scoring tool; score and fold 1/2" twice on each end of rectangles.
Cut window opening with the large magnetic rectangle die using base tray and die cutting tool.
Set accordion fold card front aside. 
Cut 8 1/2" x 5 1/2" card stock, fold, apply Miracle Sheets to card front, leave protective film on for now. Set aside.
Cut 4 1/4" x 5 1/2" white card stock, stamp windmill scene with sepia ink.
Stamp only Windmill on eclipse tape, cut out, place mask over windmill on card stock, spray blue and green Dylusions ink over card, heat set, remove mask. 
Cut trimmed piece of designer paper to fit width of card front, stamp brick background with sepia ink, apply Miracle Tape, peel off adhesive and then adhere up to windmill.
On scrap piece of Kromecote glossy card stock stamp windmill scene with sepia ink, cut out windmill, adhere using Helmar acid free glue.


Stamp brick background on accordion fold card front, use stamp-a-ma-jig to center the saying Destination Unknown stamp over brick background.
Add 1/2" strip of Miracle tape to both of the outside strips of accordion fold card, peel off adhesive, apply to background, and then line up with folded card front, remove Miracle sheet on card front and apply to accordion fold to finish.


Other supplies
Helmar acid free glue
Ranger Dylusions spray ink
MS Scoring board with tool
Designer Paper
Sizzix Movers and Shapers magnetic rectangle die
Sizzix Vagabond
Sizzix Base tray
Eclipse masking tape
Stamp-a-ma-jig
White card stock
Archival Sepia ink
Genesis Safety trimmer


Click on my blog link to view project, cards and tags I made using during the past nine months as Design Team Member for Viva Las VegaStamps!
http://wwwstampedimpressions.blogspot.com/2013/05/favorite-projects-i-did-as-vlvs-dt-2012.html

You can view more artwork on my personal blog:
  Stamped Impressions