Hey everyone. Shanna here again. I am excited to share my last guest designer project with you that I created for Viva Las Vegas Stamps.
I am beyond excited to share with you a fun card I created. I got to play with a lot of mixed media products on this card. But the stamps just make it really come to life.
I used these two stamps from the plate numbered 1436. They were both stamped using Archival ink! I cut them out and mounted them to my card using some cardboard from a shipping box.
For my background I started with some twinkling h2o's, but once it was dry used a brick wall stencil and some light modeling paste. Once that dried I added some Distress Paint splatter to make the back funky and fun.
Also I couldn't help but to add flowers. I don't know why but it screamed at me add flowers!
I am so thankful DeeDee let me be a guest this month and I had fun sharing with you all and hope that you gained some inspiration! Have an awesome crafty day!
Showing posts with label gdt. Show all posts
Friday, October 24, 2014
GDT : Shanna Shands x2
Labels:
Card,
gdt,
Guest Designer,
Mary Vogel Lozinak,
mixed media,
rubber stamps,
Shanna Shands,
stamping,
stamps,
the great unknown,
Viva Las Vegastamps,
VLVS
Friday, October 25, 2013
October 31 - by GDT Kathy Clayton
Hi, Kathy here . . . I'm back again!!! Last time I showed you a mixed media layout I did, so I thought I would show you a mixed media "tag". As many of you know, I am still pretty new at doing mixed media . . . but I am in LOVE with it. I try to add something extra to everything I do now, even to most of my CAS projects. :)
Since I absolutely LOVE Halloween, I decided to combine the best of both worlds . . .mixed media and Halloween. After a couple false starts, I finally got it together. Here's how it turned out:
VLVS products used:
Kids with Giant Jack 'o Lantern stamp #19209 http://www.vlvstamps.com/latest-releases-summer-2013/kids-with-giant-jack-o-lantern-3-1-4-x-3-1-4.html
Brick background #19077 http://www.vlvstamps.com/brick-background-2-1-4-x-5.html
High Gloss Embossing Powder
Miracle Tape
Other products: Mischievous by MME, wood paper from MME, UmWowStudio October 2012 kit, chipboard, cardboard, plastic lid, block letters from Tim Holtz, Vintage Photo and Black Soot distress ink, gesso, orange glitter, Timeless, Taupe & Tattered Leather mists, geltos (banana & blood orange), black Pitt pen, sandal & latte alcohol inks, cheesecloth, misc. flowers & grass, Tim Holze bottles, misc. dictionary pages, and misc. bottle labels,
The first thing I did was take and 2 of the orange pieces of paper from the Mischievous by MME and cut them to 9 1/2" x 12. Then cut the top two (2) corners to make them into a big "tag". Then using miracle tape adhered the paper to each side of the chipboard and then distressed it. Then using the brick background, I embossed it here 'n there on the front of the tag. Taking my dictionary pages, I distressed them with distress inks and then glued them on each side of the tag. Then using three (3) sprays (Timeless, Taupe & Tattered Leather),sprayed around the tag. I also sprayed some misc. pieces of cardboard and using glossy accents, put glitter on my lid . . . then adhered to my tag along with the cardboard pieces..I also colored my stamped
image and adhered it above the lid.
I used some wood paper and made my fence. But since I didn't like the color, I used Sandal and Latte alcohol inks and changed the color. Once it was dry, I adhered it on each side of the tag so it would bow out.
I fussy cut "O-C-T-O-B-E-R" from the block letters and used my geltos on them to help them match my tag a bit better. Using a glue gun, I adhered the letters to the outside edge of my lid. I also glued bats in three (3) places.
Using a burlap-wrapped toilet paper roll, I placed it behind my fence to use it like a table. I adhered several small bottles and added some fake grass and flowers.
I also sprayed some cheesecloth . . . then added that and a small book & tag from UmWowStudio Oct. 2012 kit. Added a few more drops of spray and I was done.
Thanks so much for stopping by today. If you want to know how you can win a $20 gift certificate from VLVS from ME, visit my blog "UpintheNightwithKat.blogspot.com" for details. Thanks again!!!
Since I absolutely LOVE Halloween, I decided to combine the best of both worlds . . .mixed media and Halloween. After a couple false starts, I finally got it together. Here's how it turned out:
VLVS products used:
Kids with Giant Jack 'o Lantern stamp #19209 http://www.vlvstamps.com/latest-releases-summer-2013/kids-with-giant-jack-o-lantern-3-1-4-x-3-1-4.html
Brick background #19077 http://www.vlvstamps.com/brick-background-2-1-4-x-5.html
High Gloss Embossing Powder
Miracle Tape
Other products: Mischievous by MME, wood paper from MME, UmWowStudio October 2012 kit, chipboard, cardboard, plastic lid, block letters from Tim Holtz, Vintage Photo and Black Soot distress ink, gesso, orange glitter, Timeless, Taupe & Tattered Leather mists, geltos (banana & blood orange), black Pitt pen, sandal & latte alcohol inks, cheesecloth, misc. flowers & grass, Tim Holze bottles, misc. dictionary pages, and misc. bottle labels,
The first thing I did was take and 2 of the orange pieces of paper from the Mischievous by MME and cut them to 9 1/2" x 12. Then cut the top two (2) corners to make them into a big "tag". Then using miracle tape adhered the paper to each side of the chipboard and then distressed it. Then using the brick background, I embossed it here 'n there on the front of the tag. Taking my dictionary pages, I distressed them with distress inks and then glued them on each side of the tag. Then using three (3) sprays (Timeless, Taupe & Tattered Leather),sprayed around the tag. I also sprayed some misc. pieces of cardboard and using glossy accents, put glitter on my lid . . . then adhered to my tag along with the cardboard pieces..I also colored my stamped
image and adhered it above the lid.
I used some wood paper and made my fence. But since I didn't like the color, I used Sandal and Latte alcohol inks and changed the color. Once it was dry, I adhered it on each side of the tag so it would bow out.
I fussy cut "O-C-T-O-B-E-R" from the block letters and used my geltos on them to help them match my tag a bit better. Using a glue gun, I adhered the letters to the outside edge of my lid. I also glued bats in three (3) places.
Using a burlap-wrapped toilet paper roll, I placed it behind my fence to use it like a table. I adhered several small bottles and added some fake grass and flowers.
I also sprayed some cheesecloth . . . then added that and a small book & tag from UmWowStudio Oct. 2012 kit. Added a few more drops of spray and I was done.
Thanks so much for stopping by today. If you want to know how you can win a $20 gift certificate from VLVS from ME, visit my blog "UpintheNightwithKat.blogspot.com" for details. Thanks again!!!
Labels:
All Hallow's Eve,
altered art,
brick background,
gdt,
Guest Designer,
Jack O Lantern,
Kathy Clayton,
Kids with giant Jack-o-Lantern,
rubber stamps,
stamping,
Viva Las Vegastamps,
VLVS
Friday, August 23, 2013
Welcome back SAMANTHA! {Guest Designer}
Today we're welcoming back August Guest designer SAMANTHA KAMINSKI.
She has brought us a beautiful ATC
Here's a tutorial on creating this beautiful bit from Samantha:
She has brought us a beautiful ATC
Design Project Two –Artist Trading Card
ATC Theme:Fairy
Title: Sparkle Always
Quote: Don't let anyone ever dull your SPARKLE!
Products Used:
o
White Card Stock x2
o
Bo Bunny Paper Back to Basics – Country Garden x2
o
Distress Ink Pads – Spun Sugar, Worn Lipstick,
Festive Berries
o
Water Brush
o
Memento Tuxedo Black Ink Pad
o
Crafter's Workshop Stencil
o
Glue and Double Sided Tape
o
Stickles - Diamond
o
Distressing Tool
o
Scissors
First cut your card stock to an Artist Trading
Card size (3.5x2.5”). I used my Silhouette Cameo which I created a template,
for both the ATC and a card slightly smaller than the ATC.
I like my ATC nice and strong so I will
generally always glue patterned paper to card stock to make it stronger. Using Distress Inks (Spun Sugar, Worn Lipstick) and TCW Stencil I
created a subtle flower background on the ATC.
Next I stamped VLVS Fairy image with Memento
Black on the card (slightly smaller than the ATC).
I used TCW Stencil and Distress Inks again to
create the same flower background around the stamped fairy.
I then added some colour (Festive berries ink using
a water brush) to the fairies dress.
I let it dry before I added glitter to the
wings and dress.
Using my distress tool I distressed the edges
of the paper and cut some slits on the side. I then adhered this to the ATC.
The quote was printed on white card stock from
my computer and distressed inked using the same colour scheme. I also added
glitter around the edges.
Then to finish it off - More Glitter, just around the edges of the ATC.
Labels:
atc,
Card,
Distress,
gdt,
girl,
girl with wings,
Guest Designer,
rubber stamp,
Samantha,
stamping,
Viva Las Vegastamps,
VLVS
Friday, April 26, 2013
Our April Guest Desinger.... WILLY!!!
I apologize for the Blogger nonsense earlier..
I thought it only right to introduce Willy in a brand new blog post!!
We're so excited to have her humor today!!
"Hi there,
My name is Willy de Bruijne and I live in the east of
the Netherlands. Since a copple of years totally hooked on rubberstamping, paper
and mixed media. Just often missing free time...
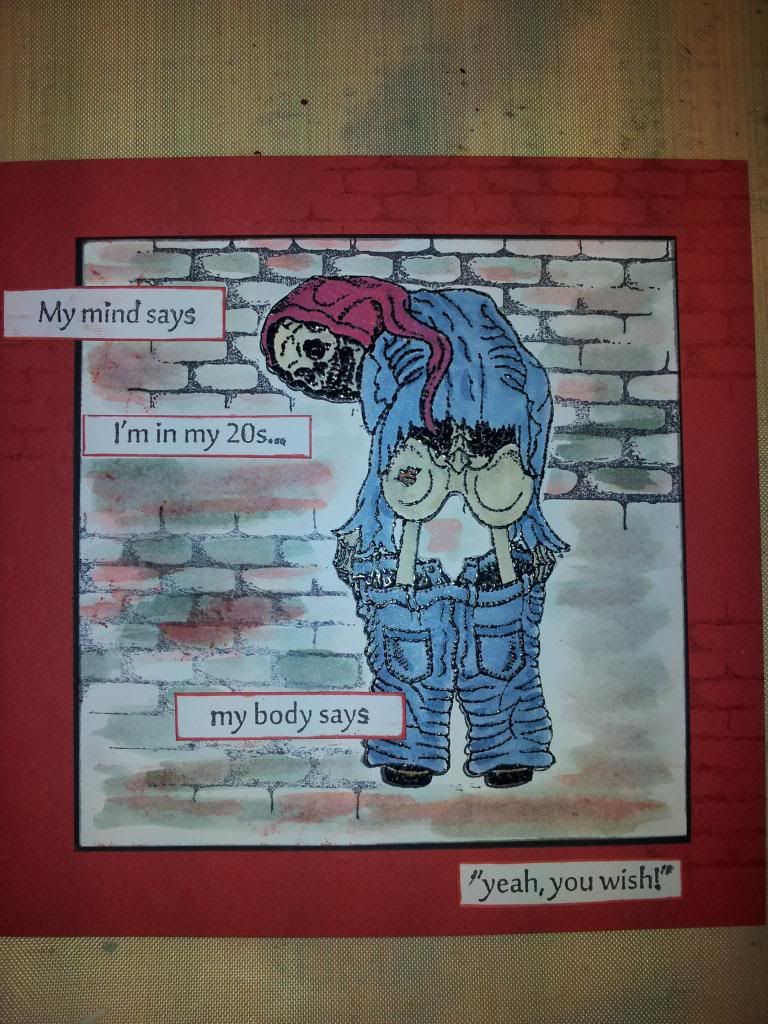
Willy has brought us this card today :
Here is a how to on building this funny from Willy:
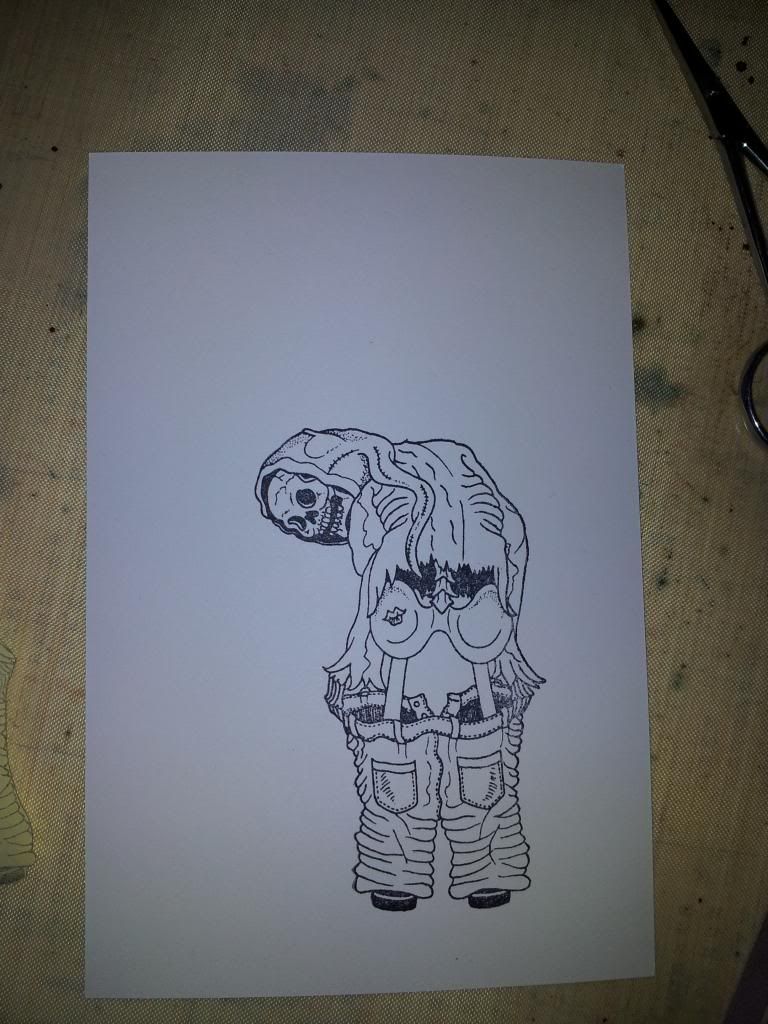
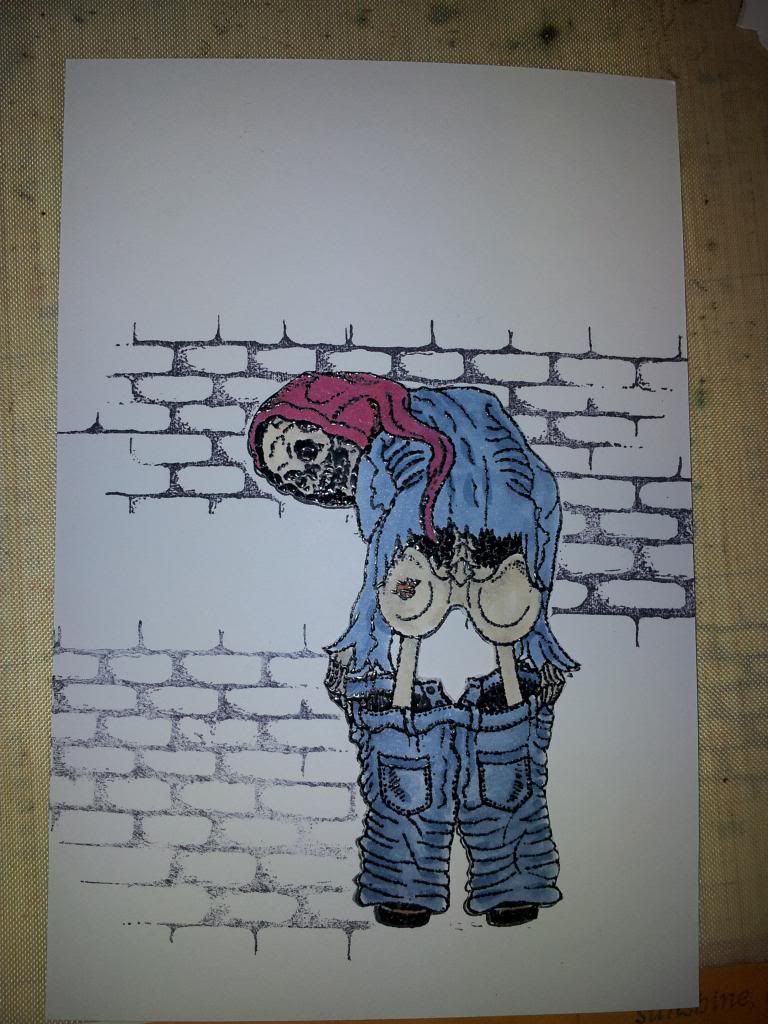
1) Stamp the Mooning Skeleton item 18810 with distress ink and emboss it with
black powder.
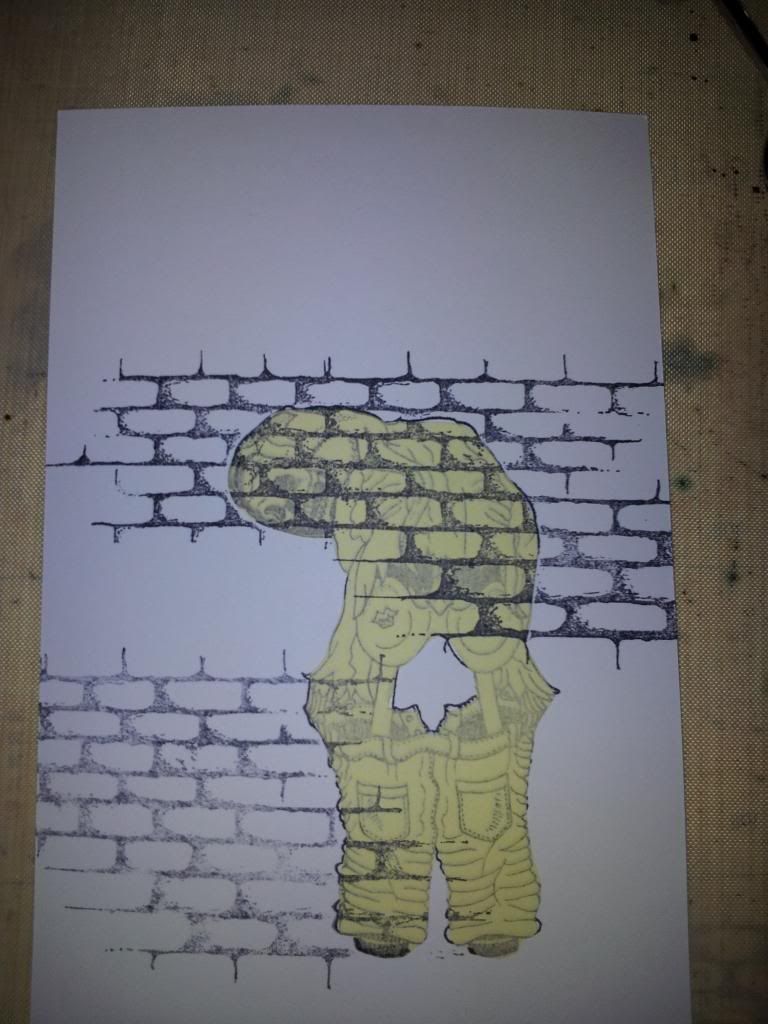
2) Make a mask
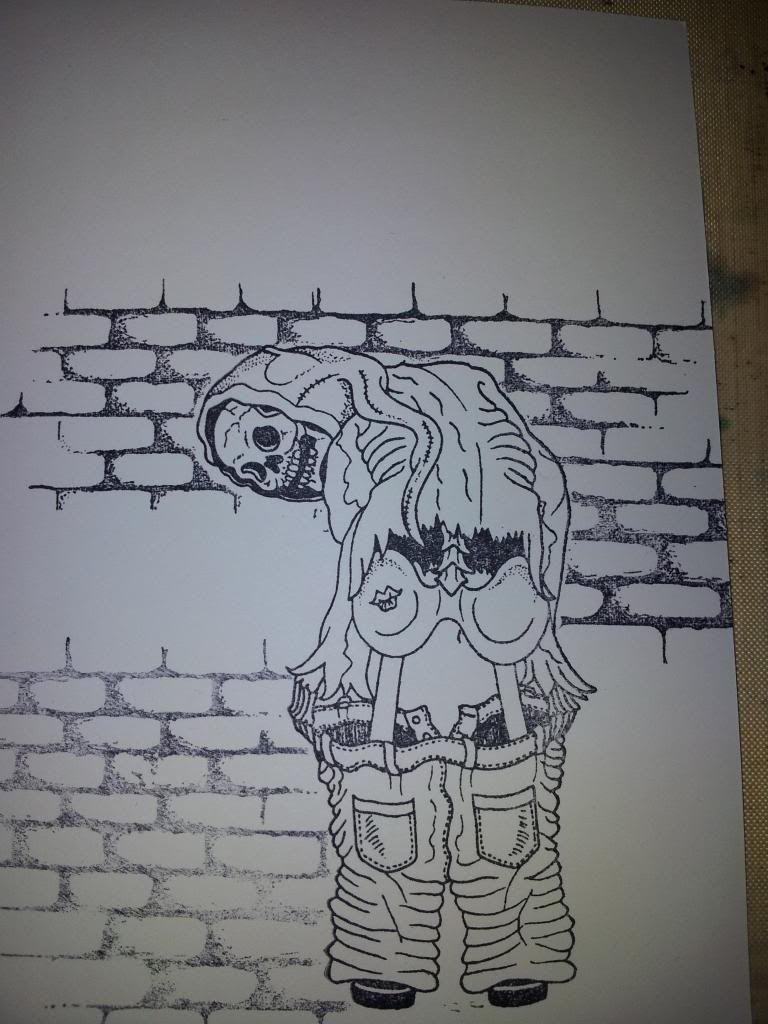
3) Stamp the Brick Background item 19077 2 times
4) remove the mask
5) Color the Skeleton with copic markers and color the background with distress ink. Finish with My mind says stamp 18773.
I love the how to and the use of the masking on this piece.. Thanks so much for stopping by Willy!!!
Labels:
gdt,
Guest Designer,
rubber stamps,
skeleton,
stamping,
Viva Las Vegastamps,
VLVS,
willy
April Guest Designer - WILLY!!
Whoops! I have no idea why the files aren't here... I'll get them up as soon as I get into the office, today!
Labels:
gdt,
Guest Designer,
rubber stamps,
stamping,
Viva Las Vegastamps,
willy
Friday, February 22, 2013
Our 2nd post from Pauline!!
Hi everybody :) I'm here with the 2nd post from Guest Designer Pauline today! She just started a blog, too.. so check her out there! : http://paulinescraftyhaven.blogspot.co.uk/
Today she brings us two very bright and beautiful pieces.. the first.. "Unicorn"
6"x 6" card, coloured with Tim Holtz Distress inks in Tumbled Glass, Squeezed Lemonade, Pine Needles. Unicorn,
stamped using 'Momento' Tuxedo Black, and coloured using a water brush
and 'Tim Holtz Distress inks' in Brushed Corduroy, Gathered Twigs, 'Uni
Posca' white pen, and 'Sakura' Clear star gelly roll pen. Stamp pure imagination at the bottom.
Project 4... Superboy !!!! 2 stamps used, Boy in Cape and Dream Big.
Boy and Sentiment stamped using 'Momento, Tuxedo Black.
Boy
coloured using 'Promarkers' in Sky Blue, Ice Grey 2, Warm Grey 3,
Satin, Putty, Khaki, Pastel Yellow, Soft Lime, Poppy, Berry Red. Large and small Tag coloured with 'Dylusions Sprays' in Crushed Grape, London Blue, Squeezed Orange, Vibrant Turquoise.
Also used..
Creative Expressions Mica Masks-Puzzle Background.
Bee crafty 'Inkables' - Arrows.
Imagination Crafts 'Sparkle Medium'- Black Stars.
Glossy Accents.
Blue Ribbon.
Brad.
Thanks so much again Pauline, all your projects were beautiful and we're honored you took the time to share your work with us!
Labels:
cards,
gdt,
Guest Designer,
Pauline,
rubber stamps,
stamping,
stamps,
Viva Las Vegastamps,
VLVS
Friday, December 28, 2012
Layout x2 by Guest Designer Louise Nelson!
Today I bring the last post by Guest Designer Louise Nelson, and she has TWO layouts to share!!
First up is layout It Awaits:
And Louise says "For
this layout and the next I have used the stamps to create subtle
background patterns with clear embossing, which I have then highlighted
with the use of water color paint and mist."
Materials List;
Viva Las Vegas Stamps - Line of Chevrons
12 x 12 grey board - Imaginarium Designs, Flower, alphas, bling - Prima, Paint - Hero Arts Water Colour Wheel, Cotton Thread, Top Boss tinted Embossing Ink, Embossing Powder - source unknown, Krylon Spray Gesso, Signo black gel pen
Second we have Two Hearts:
Materials list;
Viva Las VegaStamp! - Flying Bird Trio 3/4 x 1
12 x 12 grey board - Imaginarium Designs, Leaves, flowers, alphas, bling - Prima, Paint - Hero Arts Water Colour Wheel, Mist - Tattered Angels, Heart - Studio Calico, Cotton Thread, Staples
Top Boss tinted Embossing Ink, Embossing Powder - source unknown, Krylon Spray Gesso
A big round of applause to Louise for sharing her beautiful work with us this month!! Thank you so much!!!
Labels:
12x12,
background,
bird trio,
birds,
chevron,
Design Team,
DT,
gdt,
layouts,
Louise Nelson,
misting,
rubber stamps,
scrapbooking,
stamping,
Viva Las Vegastamps,
VLVS
Friday, December 14, 2012
December Guest Designer.. Louise Nelson!!!
I seriously cannot tell you how excited I am to be introducing our December Guest Designer... LOUISE NELSON!!!
Her work has always blown me away, and where in the past I've asked card makers and scene stampers to be a guest, I thought it was time to get a mixed media/scrapbooker in here! And... I got the best!!
You can find Louise in the following places:
Blog: an Uninterrupted view
Facebook: https://www. facebook.com/loolabelle1961
Twitter: https://twitter.com/ loolabelle1961
and here's a bit about her "I
have always had creative hobbies, before taking up scrapbooking 6 years
ago I loved to restore furniture. Since I have started scrapbooking I
have also devloped a love for portrait photography, and more recently I
have begun to dabble in painting. During the last 6 years I have been
fortunate to have been a Creative Design Team member for Scrapbooking
Memories Magazine [AUS] in 2009 and currently a Scrapbooking Memories
Master for 2011-12. Also fortunate to be invited to be on the Creative
Design Team for UK based scrapbooking magazine; Scrap365. Currently I
create for Aussie Scrap Source, Jenni Bowlin Studio, Imaginarium
Designs, Tattered Angels and 7 Dots Studio. I have been blessed to be
published in Scrapbooking Memories [AUS], and have also been featured in
the last 4 editions of Somerset Memories, with technique articles and
layouts in the reader gallery. I am so honoured that DeeDee asked me to
contribute this month to your wonderful inspiring blog; thank you so
very much for allowing me to share my stampy scrappy passion."
Now.. onto the work:
Materials list:
12 x 12 grey board - Imaginarium Designs
Impasto
Krylon spray gesso
Tattered Angels Chalkboard Glimmer Mist
Prima Metal Trinkets
Green Tara Leaves
Indian ink
Cotton Thread
To achieve the background Louise says she applied a thick layer of impasto to the background, stamped the image in to it, and then gave it a final coat of spray gesso.
Leave her some love and let her know what you think :)
Labels:
12x12,
art stamping,
background,
crackle,
gdt,
gesso,
Guest Designer,
layout,
Louise Nelson,
rubber stamps,
stamping,
Viva Las Vegastamps,
VLVS
Monday, November 26, 2012
Create your own patterned paper with Guest Designer Birgit Koopsen!
Hi there! Birgit here again for my second post as a guest designer on the VivaLasVegaStamps blog. So nice to be here again! Today I would like to share a layout with you. It's about our family trip to Malta for fall break. My son and youngest daugther had never been on a plane before so it was a whole new and exciting experience for them. But they loved it!
As a scrapbooker who loves to create her own patterned paper I'm always looking for great (big) background stamps that I can use is severals ways.
For today's layout I used these 2 beauties:

I wanted to create a multi colored background and instead of using several ink pads I crreated my own colored ink pad. I took an old and unusable Versamark ink pad and added several colors of distress ink.
To create the patterend paper I used the Postal Background stamp.
I used the Hollywood/The Beatles stamp to create the orange strip of paper at the right side.
To create the kite tail I first "drew" the line using a paper piecer and then embroidered with black embroidery thread. In every 6th stitch I added a little piece of tissue paper to create the little bows.
I hope you liked my post!
Wishing you a lovely day! Happy stamping :)
Labels:
background,
birgit koopsen,
gdt,
Guest Designer,
layout,
postal,
rubber stamping,
stamps,
ticket stub,
Viva Las Vegastamps,
VLVS
Subscribe to:
Posts (Atom)