Showing posts with label christmas cards. Show all posts

Monday, November 29, 2021

Friends are the heart of Christmas ► Majo

 Hello my friends,

 more Christmas cards for friends and family. This time I used the cute Christmas Elf and masked the image after stamping. I stamped the Charred Wood Background on top and colored the elf with Faber Castell Pitt Artist Pens.


 I made the strings a bit longer to fit my card and added some loops. I adhered the panel to my card, ready to go♥


 I have used the following stamps:

Sentiment

Christmas Elf

Charred Wood Background

 Have a wonderful time with lots of time for crafting, relaxing and hanging out with friends ♥


Monday, November 02, 2015

Challenge inspiration november

Hi Hermine here. Every year I make myself a promisse to start making Christmas cards in january, do one a week and at th end of the year you have a great stack, but as always, in november I think WHY didn't I keep my promisse to myself when I realise I didn;t start yet. So here I started up with one idea and ended with 3 cards, now we are talking :o)


step 1: I cut a snowflake out of a doble card on the right hand side.
step 2: take a seperate piece of paper colour with a turquoise spray ink, leave to dry. Then take a template with the circles and spray again, leave to dry. Sponge with Distress ink the ouside circle so the tips of the snowflake turn out darker.
step 3: take Memento Luxe Wedding dress and stamp Xmas Silhouette collage 19713 and stars19291.
step 4: glue the coloured card behind the snowflake and splatter some ink on the front of the double card. 


step 1: Because I still had the die-cut of the snowflake I deciced to use that as a mask, so put the snowflake on a double card on the right hand side and spray with turquoise spray in an dleave to dry.
step 2: put back on the snowflake and sponge with a few colours Distress ink.
step 3: Stamp with Memento Luxe Weddingdress Redwood Tress 19718 and a few times Fir Trees Silhouette 19723
step 4: Take Versamakr and stamp the Xmas silhouette Collage and the stars (on the right as well as on the left of the Xmas silhouette) and emboss with white embmossing powder.
step 5: splatter some water on the card and remove the water with a paper towel.


step 1: What was left was this awesome coloured snowflake and couldn't resist to make another card with so I stamped the Xmas Silhouette collage and the stars with Stazon Black.
step 2: spray some turqouise spray ink at the bottom of the card.
step 3: stamp with Versamark the Fir trees Silhouette twice and emboss with white embossingpowder.
step 4: Glue the snowflake in place.


Look HERE for all information about the November challenge and here is the inspiration board.


Hope you like it. And don't forget to enter the challenge, its so much fun to do.


Warmly Hermine


Used materials:


Saturday, October 26, 2013

tutorial with bold stamps and Lyra

Hi Hermine here! I made this tutorial due to a card that I made for a challenge and people wanted to know how I did it. This is so easy, awesome and fun to do. THE way to make your Christmas cards for instance, its looks great and because one has to make a lot of them its a good thing that it is so easy and fun to make.


This is the end result of my tutorial, below you find a step-by-step of how I did this.


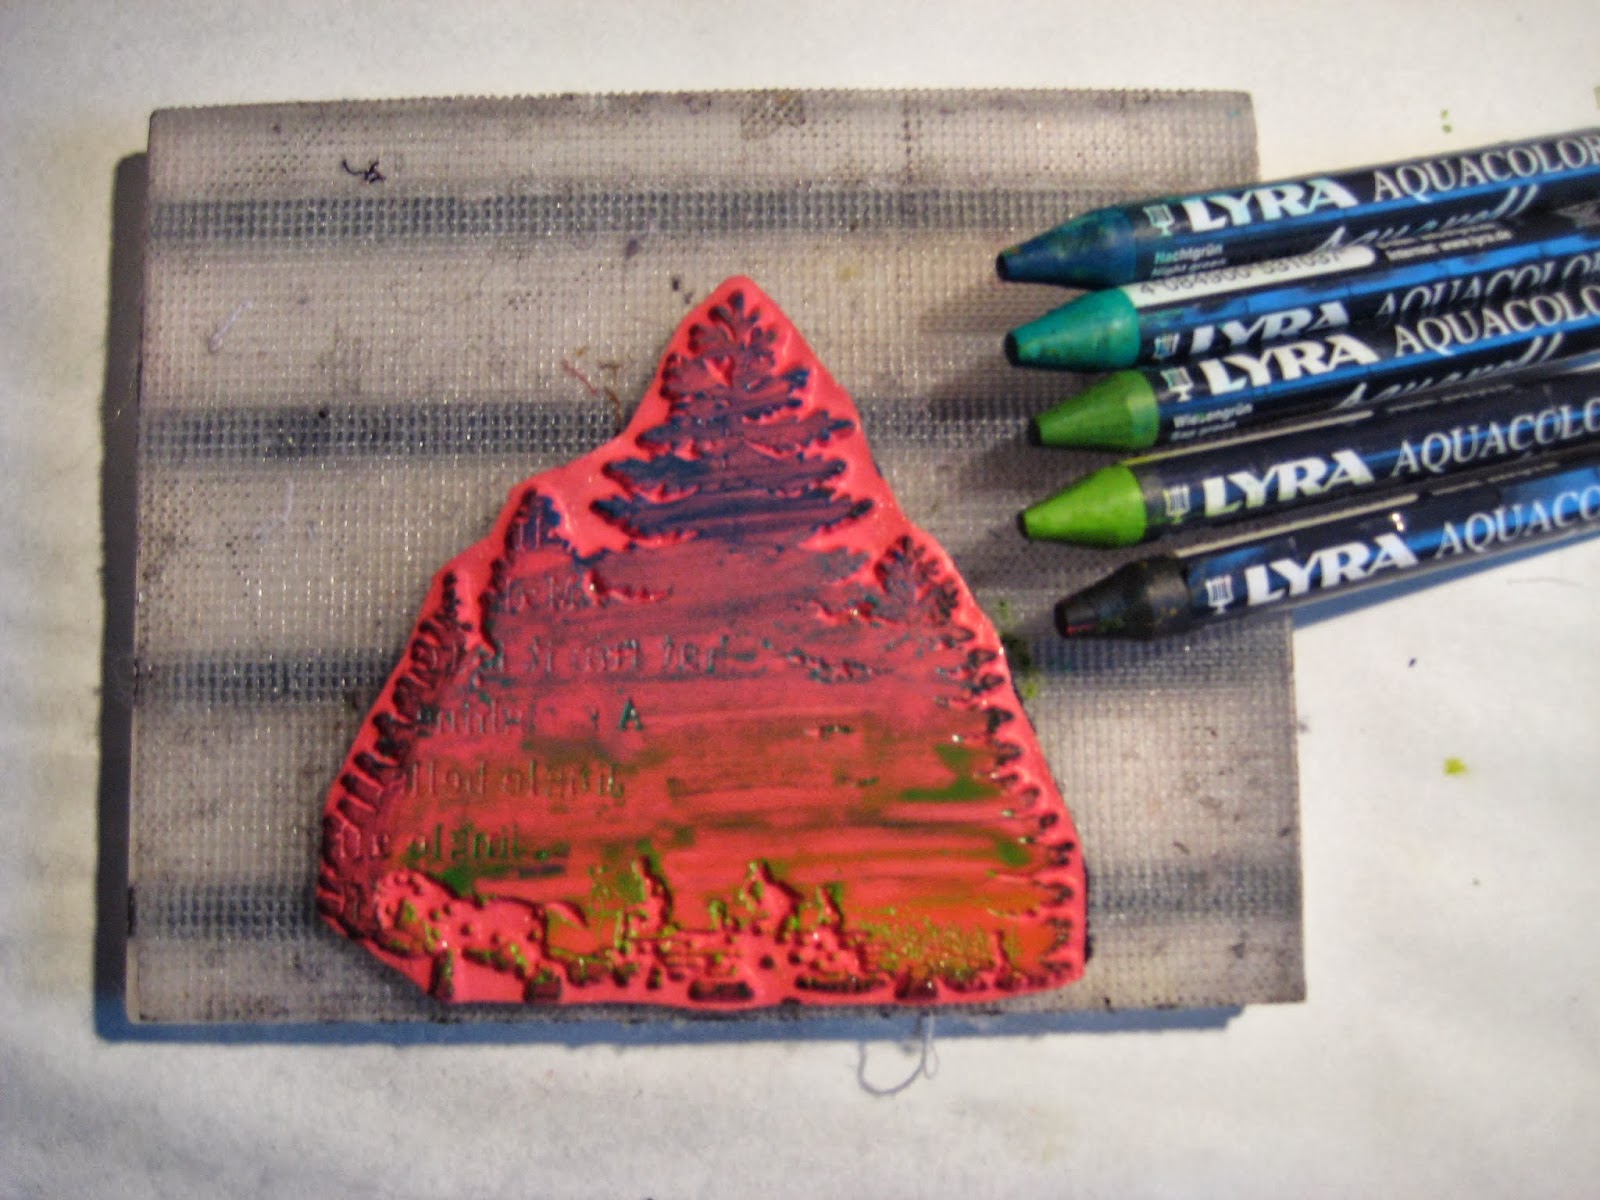
start by making you stamp a little damp (not to wet, if you make it to wet put a piece of paper towel on it to absorb the water)


Take different colours of Lyra aquacolor and scribble on your stamp.


Take a spray bottle and spray water on it (again not to much)


Stamp on paper and let dry, I prefer to let it dry by air, but you can dry it with a heattool.


Take a Sukura of America micron 005 pen and outline the stamp.


This is a close-up after I outlined it.


Take a water brush and take some colour directly from your crayon.


Splatter this on the right hand side of the card.


Take a scrap piece of paper and stamp the tekst on it, colour this with a water brush and the same colours of the Lyra crayons you used for the main image. Glue in place.


Another sample I made with the same technique and same colours, only different stamps.

Used Stamps:
Xmas Silhouette Collage 19317
Bring on the twinkle 19313
Set of three ornaments 19309
with love 19302
All these stamps can also been found on plate 1411
Stazon jet black
Sakura of America micron pen 005


Wednesday, December 05, 2012

Christmas Card & Gift Set

Merry Christmas all you Viva Las VegaStamps fans! 

Pinky here today with a gift and card project using the incredibly crisp and clear VLVS stamps!
I have been playing with enamel powders and decided to create not only a card 
but also a gift canvas. I cannot get over how incredibly clear the VLVS stamp even
while using embossing/enamel powders. See for yourself how clear it is. 
 For this card I 
1. Stamp the VLVS image onto cream card-stock using embossing ink.
2. Sprinkle gently using embossing enamel. 
3. Heat set using heat gun.
4. Trim out stamped image. 
5. Trim out 7X7 cardstock.
6. Coat card-stock with enamel ink and enamels.
7. Heat set entire page. 
8. Trim paper to proper size- use border punch to create decorative border. 
9. Using Miracle Tape-adhere stamped image to punched cardstock. 
10. Adhere metals to card corners.
11. Adhere card face to card base. 
I followed the same steps for the canvas pictured below except
instead of adhering it to the card base I adhered it to the canvas that
I had used embossing enamels on. Then I added the ribbons. 
When you want a clear stamped image, you know you can trust VLVS! 

Until next time!


Products Used:
Globecraft Piccolo Enamel Powder
Momenta Metals, Patterned Papers
Ribbon, Viva Decor Pearl Pen, Border Punch by Fiskars