Showing posts with label arrow. Show all posts

Monday, August 27, 2018

Frightfully Fun Mail Art Monday

Hello Crafty Friends!!!

It's almost time... and I've already got the Halloween itch. 

 The chill was in the air for a few days, and that's all it took. 
(Yes, I am one of those crazy fall people, and yes I love pumpkin everything.)


Ok, back on subject.
Today I want to share a super fun envelope for mail art monday. 

Stamps Used:
Below you can see all of my base stamping.
(I stamped the skeleton family first then, masked it off.)

Next, I used Blick alcohol markers to color my base boarder. 


Next, I inked my background with Tim Holtz Distress ink in- Mustard Seed, and Squeezed Lemonade.
Then, I added some stencil details with carved pumpkin Distress ink. 
(sorry the colors are a bit washed out in this photo)


After I finished this one, and loved it so much I decided to create a few more in other colors. 
(I have a few friends with different favorite colors)


Thank you for Joining me today!!! 
I hope you all enjoy this early fall inspiration!


Monday, September 18, 2017

Mail Art Envelope by Susanne


Hi my dear crafty friends!

It's Mail Art Monday today and I have an envelope with the lovely "Girl With Wings" for you.


I picked on of my gelli printed papers and build an envelope with the Envelope Punch Board. Before I glue the envelope together I decorate it:
I stamp the main image onto the front with the Tim Holtz Stamp Platform. I make a second print onto white cardstock.


I cut this one directly on the outlines and colour it with Distress Inks.


I paint a white address field with gesso, add some more stamping and glue the envelope together. Finally I adhere the main image.
In case you don't send any mail art, you can use those envelopes perfectly in your art/ junk journals!


Thank you for stopping by today.
xx Susanne.


Supplies:
Viva Las VegaStamps!:
Others:
Gelli Plate
Gesso
Archival Ink


Tuesday, May 13, 2014

Viva Las VegaStamps & Pan Pastels!

And 2nd today for our Pan Pastels Feature is the superbly talented Glenda Tkalac!


Ok, how exciting was this?? We were given some yummy pan pastels to play with and it was my first time playing with them, I was a Pan Pastels virgin!! haha I decided that I wanted to do two projects using the uber fabulous Running lady stamp
She looks exactly how I've been feeling lately so I decided to do an art journal page using her as well as these other fab stamps, the film strip stamp
and the one way stamp
and the one way small stamp
and the pylon stamp
and last but not least the arrow stamp
First of all I took a brick wall stencil and then sprayed it and then laid it onto my journal page and pressed evenly so I only got some of it (and yes I had to enjoy a nice cold beer while doing this)... also forgive the dim pics as I was playing at night!
 Then I took some of the orange pan pastel and used the sponge tool and colored when I wanted orange.
 Now it was time for placement! I had stamped the running lady stamp onto plain white cardstock and then cut her out and placed her where I wanted her, and then used black shimmerz to create a black cloud above her ('cause that's how I'm feeling lately!)
 then I got all kinds of other fun stuff as well as the cut out stamps and glued them onto my journal page.
 and here is my finished journal page!
I also made an ATC using the running lady stamps and pan pastels.  Here are the materials I used
 Once I glued the papers I wanted together onto a 2 1/2 by 3 1/2 piece of white cardstock I then took a stencil and placed it on top of the papers, and then using the sponge rubbed the orange pan pastels where I wanted it and sprayed a clear coat fixative onto it so the pastels wouldn't rub off
 I also had a rub on that was really old and crappy and wouldn't rub on so I taped it onto the card using clear tape and then glued the running lady onto the card, smudged the edges using staz on ink and voila! Here is my ATC.
I hope you enjoyed seeing how I used these stamps as well as the Pan Pastels and until next time!


Sunday, April 27, 2014

Wheeling in with Spring Color

wheelie man full card2
Hello stampers! It's Amy here today share a card I've made, with lots of springy bright colors. I'm happy when I see it, and that's a good thing.
wheelie man arrows and cirlce

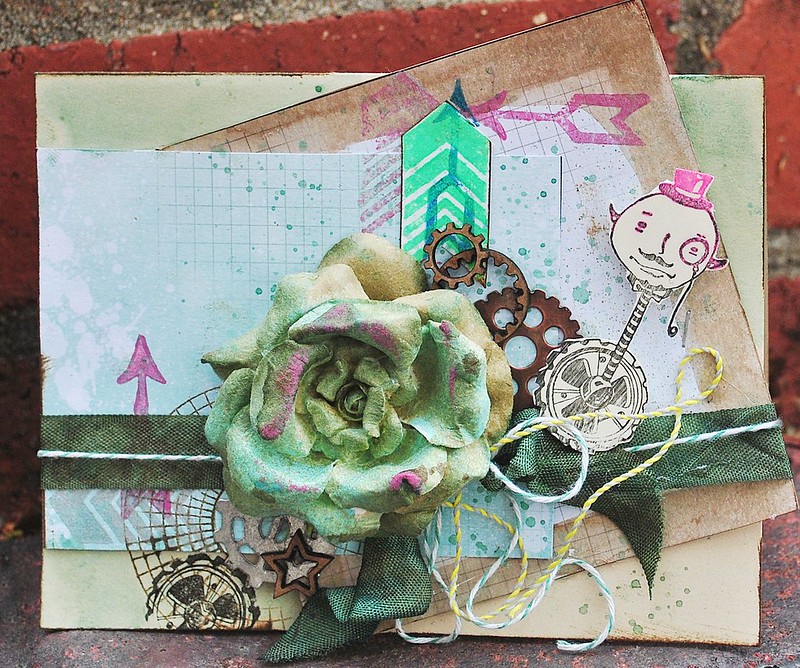
I started my project by layering on two haphazardly cut squares of pretty patterned paper. I inked the edges of one paper, using walnut ink, and both edges were inked with Archival Ink in coffee. These were adhered with Miracle Tape. I tapped on a little bit of green mist, and then stamped the Arrow 3/4x1 1/2,and Chevrons 1x1 1/2, directly onto the paper, using pink and silver inks. I stamped with green ink and the chevron stamp onto a separate paper,and fussy cut this out, inked the edges, and adhered with miracle tape. The final bit of the layers of stamping was to stamp the color wheel lines stamp in the bottom corner, and the wheel from the Wheeley Monocle Face slightly off the page.

wheelie man, arrows close

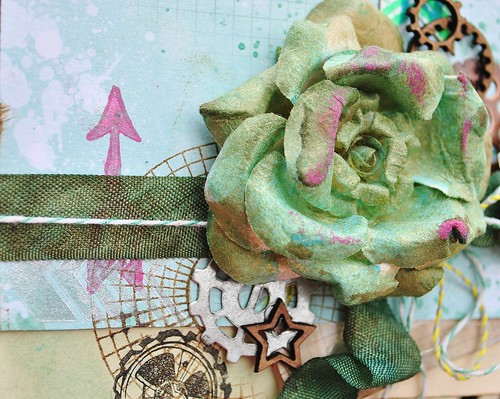
I dyed my own seam binding ribbon with the green and brown walnut inks, dried it, and adhered it using miracle tape on the back. To the tied ribbon I added some baker's twine for extra pizzaz.;) I sprayed the Prima flower with mists, adhered, and added the chipboard and metal pieces.
wheelie man, close
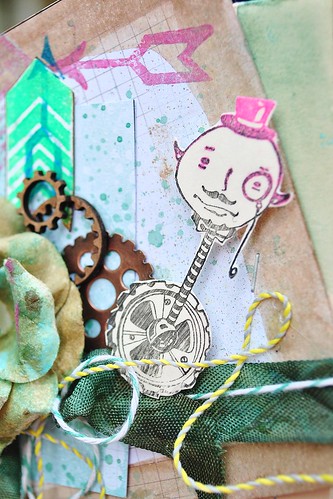
Finally,I colored on the wheeley monocle face stamp with a Faber-Castell Big Brush Pen in black, and then swiped on some radiant neon ink in electric pink....to give some va-va-voom to his hat, eyes, and monocle, and stamped that baby onto some heavy cardstock. I fussy cut him out, and popped him onto the paper, using foam dots. And voila! A fun, springy, and special card to pop into the mail for a friend!

Thanks so much for having a look today! I hope you were inspired to start stamping up a storm! :)
<3 Amy

Supply List:
Viva Las VegaStamps!: Wheeley Monocle Face, Arrow 3/4x1 1/2, Chevrons 1x1 1/2, color wheel lines
Ink: Tsukineko/Imagine Crafts-Delicata Silver, Radiant Neon in Electric Pink,Green
Paper: 7 Dots Studio-Messy Head
Pen: Faber-Castell Design Memory Craft, Big Brush Pen in Black.
Chipboard: UmWowStudio
Flower: Prima
Mist: Imagine Crafts-Walnut Ink in Eucalyptus, Java; Lindy's Stamp Gang-Midnight Teal Starburst; Heidi Swapp Color Shine-Teal Other: Seambinding, baker's twine, metal gears

Thursday, February 28, 2013

Be Happy!


Good morning everyone!

DeeDee here today sharing with you a tag I made at last week's Saturday Craft Fair
Saturday Craft Fair is a time on each Saturday where crafty folks gather and stream live to do projects with you! I'll be there every last Saturday of the month from 11 am to 12 pm. And I'll ALWAYS be using VLVS!  :) Our very own Susan streams every week and lots of other great crafters, too!


Here is the tag I made:


I used the following stamps:
Flying Bird Trio 4.25x1 - $4.50

The paper is by Teresa Collins, The ribbon May Arts, the brad Basic Grey. The washi tape is from Gauche Alchemy, the mist is Tattered Angels, the layered chipboard is UmWowStudio. I used a black pen to draw the lines on the outside, a dymo label maker for the Be Happy and distress makers to color the hat. All stamps are stamped in black archival ink.

You can watch a full video here (beware.. it's a recorded session almost an hour long with converstaion) here
(give it time to load :) )