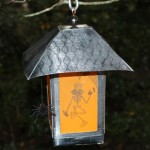
I’m so excited to be sharing my first project with you, as a new member of the Viva Las Vegastamps! Design Team (DT)! It was so hard to pick just one Halloween image from the huge variety of stamps Viva Las Vegastamps! has in their 15,000+ collection that I needed to come up with some way to use many stamps. I love three dimensional pieces made from paper and Halloween makes me think of nighttime, so a lantern came to mind.
 |  |  |  |
This is a really simple project to make. I’m providing you with a zip file of the pattern (as a PDF you can print and cut out, as an SVG file you can import into cutting software and as a Sure Cuts A Lot SCAL V2 project file). CLICK HERE to download the Halloween lantern pattern files.
It started with a half-gallon cardboard milk carton. Wash it out well and cut off the top. Leave a small tab at the top of each side so you have a place to adhere the roof.
Cut out four roof panels, four frames and the top piece from cardboard. I used cereal boxes. Use the inside piece of a frame as a template to cut a window on each side of the cereal box about 1” from the bottom using a craft knife.
Once you have all the pieces cut out, cover them with aluminum tape, dry emboss the roof panels (to give them some texture), and coat the pieces with black alcohol ink. Once the ink is dry (about 10 minutes), distress the surfaces with a steel wool pad. This will make the embossed pattern really pop and gives the lantern an old steel-like finish.
Punch a small hole in the center of the top piece so you can attach a wire to use as a hanger.
Cut out four vellum panels (using a frame as a template) and stamp your images with dye ink. I used these 8 stamps from Viva Las Vegastamps!:
- Grim Reaper 2 3/4 x 3 3/4
- Skeleton RIP 2 3/4 x 3 1/2
- Bat 3/4 x 1
- Spider And Web In Corner 2 1/4 x 2
- Corner Cobweb 1 1/2 x 1 1/4
- Skeleton Dancing 2 x 3 1/2
- Spider Looking For Little Miss Muffet 1 1/4 x 1 1/2
- Skeleton With Cigarette & Drink 2 3/4 x 3 3/4
Adhere the vellum panels to the frames with Miracle Tape and you’re ready to assemble your lantern.
First create the roof by folding the tabs of each roof panel to the back and then adhering them together using Miracle Tape. I stapled each tab too for extra holding power. Then attach the roof piece. Create a wire hanger and put it through the hole. I put a bead on top from an old necklace I picked up at a flea market.
Adhere the roof to the milk carton by using Miracle Tape on the tabs you made along the top of the cartoon.
Adhere three of the frames to the milk cartoon using Miracle Tape. Attach the fourth panel with magnetics or Velcro dots, so you can easily remove it to maintain the battery operated votive candle.
For added fun, dangle a spider from a thread under the roof. Just punch two spiders and glue them back to back with a piece of thread sandwiched between them. Coat the spider withCrystal Lacquer for added strength (and some shine). Attach a red rhinestone. Use a needle to punch a hold under the roof and tie up the thread.
Think how fun several of these would look around your house (they stand really well) or hanging in your front yard!
 |  |  |  |
I also want to invite you to participate in the Viva Las Vegastamps! Theme Challenge for October. Submit “Halloween” creations you made using Viva Las Vegastamps! for a chance to win a $25 gift certificate at the Viva Las Vegastamps! online store. CLICK HERE for submission instructions.
Visit my blog at Create & Craft to see my other projects. Have fun!Joe


11 comments:
WOW!!!! What a great project. I love that they could light up the path the the house on Halloween.
Great project!
Joe - this project is SPOOK-tacular! I love the video description, too. I really love the pitched roof and attention to the details and that is a GREENcraft project [ie; the swing out door and magnets]. I will be making one of these. TFS!!! Susan : )
Wow! Very cool project and post! I can't wait to add YOUR lantern to MY collection of Halloween lanterns! ;-)
You are just too cool for words. What a great project!
This is just the coolest project! Love it! Recycling cartons - great idea. Thank you!
Oooh, I Love this project!
Very cool Joe! Halloween is my fav holiday! I hope I have time to try this one out myself! :0)
Great tutorial, Joe for a fun Halloween project... I'm heavily into recycling myself... or should I say "upcycling".
Very kewl project! easy and such great dramatic presentation! Love it!
wow these are amazing. I cant wait to try and make one of these myself. awesome. cant wait to grab some viva stamps and give it a whirl. thanks for sharing
Post a Comment