Monday, October 14, 2019

Recipe for Sweets

The holidays are right around the corner, can you believe it??!
Michele here today and I was inspired by all of the holiday sweets that we all love for this set of ATC's.


Stamps used:  Stack of Macaroons, Calories Don't Count, HEHEHE, Have a Nice Day, Delight in the Little Things, Doodle Border, Recipe Card, Victorian Flourish

The ATC bases are a piece of cardstock with Dina Wakley paints on the gelli plate.  The background stamps are the colors of the paint to fade.


The Macaroons are colored with Prisma colored pencils and the filling is stickles.


The macaroon stack was cut up and arranged on the ATC's.


Some washi so the macaroons didn't look like they are floating and a little border stamping.


The edges all have Distress Ink and finally some splatters with Distress Oxide Spray.

What's your favorite holiday treat??  We have Halloween, Thanksgiving and Christmas all coming up quick...what will you be making??

Until next time, get inky!!

Saturday, October 12, 2019

Scribble that shit out

Hello everyone,

For today's project I have made an art journal spread. I have used some of the latest release stamps. I love the scribble girls by Tina Walker and I had to use one today.


I started this page with a gel printed piece of paper and added stencilling and stamping to the background using different inks. I added some black paint along the edges to frame the pages. I used a palette knife for this.
The girl was stamped on the page and on some white card stock. I coloured her, cut her out and glued her onto herself on the page. I then coloured the earrings and necklace with a paint pen. Lastly I added the sentiment and doodled around it with a black pen. 


Here's a close up... 

I used the following stamps:


I also used:
Amsterdam Acrylics to make the gel print
Archival Inks in Aquamarine, Veridian and Jet Black
StaZon - Dove Grey
Distress Oxide ink - Tumbled glass
A flower stencil 
Black acrylic paint for edging the pages

Thank you so much for stopping by today ! 

Thursday, October 10, 2019

Art Journal Page by Preeti D.

Hi friends :)
Hope you are doing well.
Preeti Datta (Dutt Preety) here from the VLVS! Design Team. 
For today's post, I've created an Art Journal Page.  
I've used some gorgeous VLVS! Rubber Stamps here.
I was inspired by Banksy Style graffiti art and tried to depict a grungy, old wall.

I've used a wall stencil here to create the background.

  I've used 2 colours of distress oxides to create the old, worn out, grungy look. 


VLVS! Supplies:


Other Supplies:

Maremismallart Stencil - Stoned Wall
Finnabair's Heavy White Gesso, Heavy Black Gesso
Ranger's Archival Inkpads- Jet Black and Potting Soil
Tim Holtz Distress Oxide Inkpads - Iced Spruce and Vintage Photo

Thanks a lot for your precious time :)
Stay Blessed!
Preeti

Friday, October 04, 2019

Art Journal: Perspective of Time by Cheetarah


Hi VLVStampers! Hope you all are having a wonderful day so far. It's Cheetarah here on the blog today and I have a little art journal spread to share with you made with lush VLVS! The focal point is a wonderful whimsical Scribble Girl designed by Tina Walker which is a new release! Check out the full plate HERE. Let me tell you how I made it and as usual, list of stamps are at the bottom of the post. 

I stared off in my pocket junk journal by adding gesso over some glued down ephemera (dictionary/book pages) and then scraping color with a used gift card until I was satisfied with the blend. I used midnight blue, fuchsia and a sea green acrylic paint for this. To add some more texture I took out my StencilGirl Stencils with some wonky geometrical shapes and lightly dabbed some paint through them. 


Next step I added more texture by stamping some yummy VLVS! texture stamps with Staz-On inks over the painted layer. The sentiment Past Present Future is also from a StencilGirl Stencil. I first used the sea green paint then traced it with a Fudeball pen. Now the base layer is done and went to work with the focal point. 

Tip if you want to use watercolors over acrylic paint layers: I bought this product a while back, watercolor ground by Daniel Smith Artists materials and really wanted to test it out as I love coloring images with watercolors. I applied a bit on the right page dried it with a heat tool to set then I stamped my focal image on it with archival ink. Then heat set it. My image was ready to be color in! Showing you some process shots of the coloring below:

The ground took the watercolors (Jane Davenport brand) very nicely and I was patient with adding the colors in layer and give it enough time to blend and dry until I was satisfied with the over all look of the the woman. Also the ground knocked down the background in brightness and to bring the pages together I stamped the previously used texture stamps over this layer. 

Stamped the word 'perspective' in the middle and splattered some rose gold paint & added a black border and called it done. 


Stamps used: 

Materials used:
Gesso
Dina Wakley paints
Daniel Smith watercolor ground
StencilGirl Stencils
Jane Davenport watercolors
Stazon & archival ink pads
Heat tool
black Distress crayon  

Hope this inspired you to take your your VLVS! and have a play with them!

Until next time! 
Have a lovely day.

Thursday, October 03, 2019

Spooky - Halloween/October Challenge 2019

Hello everyone,
welcome to SPOOKY...
Halloween 2019.
You might have guessed but this months challenge is.....
HALLOWEEN!!! (Insert spooky music)....
so for this project I've created a little tag and Step by step instructions...
 starting off with a Dylusions Tag, I added some magazine pieces, and then layered
a Kinder Kreations Tree stencil (KK1657) with Modelling Paste.
 allowed it to dry and then covered it with Black Gesso 
 Then I got out my first of my Halloween stamps
this super cool and slightly rude 
Skeleton Family (sku: 19206)
with black Stazon Ink. I stamped 3 of them because I wanted to layer them up.
 Fussy cut them out, with each layer taking a little more away.
 I coloured the last one with Tim Holtz Distress Oxide in Carved Pumpkin
The top two I just used Gel Medium
and for the bottom set I used some foam mount to add a little more dimension
 Next I went back to the background and stamped
Fancy Spiderweb Corner (sku: 19208)
in the bottom corners with Distress Oxide in Hickory Smoke
added some Lindy's Gang Angel Wings Sapphire Embossing powder and heat set it.
 Then I added the "stars"

Cross Marks Background (sku: 20165)
with Distress Oxide in Wild Honey and Embossed 
with Lindy's Gang Adobe Fire embossing powder
 next up I added the 
Full Moon (sku: 18911)
with Distress Oxide Blueprint Sketch and Embossed 
with Lindy's Gang Desert Moon Turquoise
 I added some fibres to the top and stitched the edges 
 then I added my Layered up Skeleton Family 
(which I added a wash of Distress Oxides: Hickory Smoke and Iced Spruce)
and finished off with 
Spooky (sku: 19735)
with Wild Honey and Embossed 
with Lindy's Gang, Adobe Fire powder. 
I also added some colour to the background tree with Silks Acrylic Glaze Nutmeg
 the final product...
Don't forget to check out the Facebook Groupies page and Load your Halloween creations
to enter the October Challenge ( #oct19)
"Spooky"


VLVS! used:
Skeleton Family (sku: 19206)
Fancy Spiderweb Corner (sku: 19208)
Cross Marks Background (sku: 20165)
Full Moon (sku: 18911)
Spooky (sku: 19735)


Other materials used:
Dylusions Tag
Magazine Text
Kinder Kreations Tree Stencil (KK 1657)
Matisse Black Gesso
Stazon Jet Black Ink Pad
Ranger/Tim Holtz Distress Oxide: Hickory Smoke, Wild Honey, Blueprint Sketch, Iced Spruce,                                                                  Carved Pumpkin
Silks Acrylic Glaze Nutmeg
Thread

Live with Respect
Leanne xo

Friday, September 27, 2019

Mixed Media Card by Preeti D.

Hi friends :)
Hope you are doing well.
Preeti Datta (Dutt Preety) here from the VLVS! Design Team. 
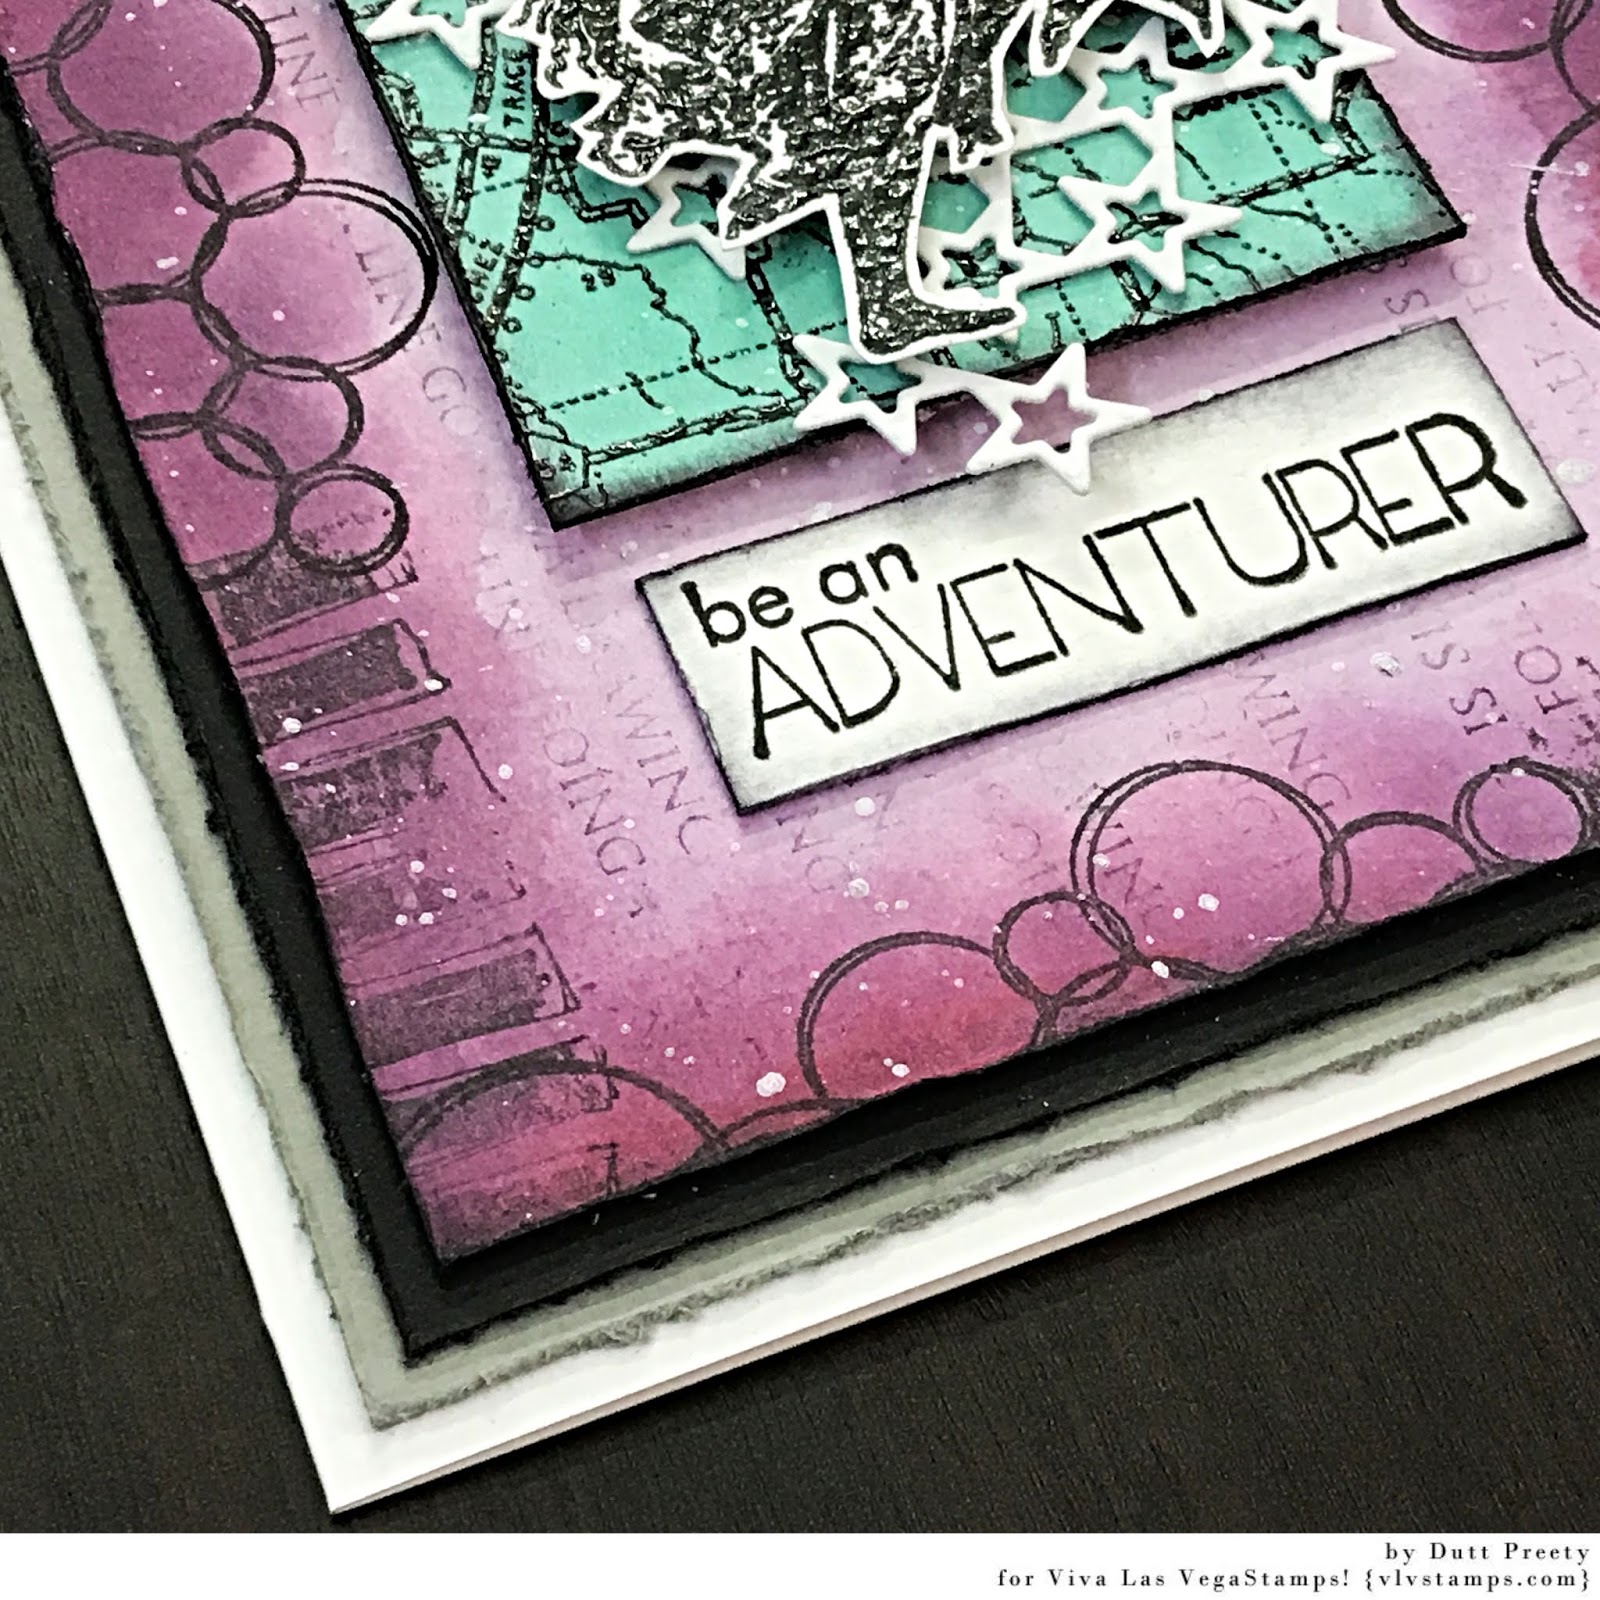
For today's post, I've created a Mixed Media Card. 
I've used some gorgeous VLVS! Rubber Stamps here.


First, I cut a panel of 300 gsm watercolour paper to create the card base. To colour it, I used Lindy's Gang Squirts and Sprays in shades of purple and pink. Dried the panel & stamped around it's edges using Versafine Onyx Black Ink and VLVS! Stamps- Overlapping Circles by Corrie Herriman, Row of Scribble Squares and A Drawing Is. Then, deckled and distressed the edges of the panel.

Stamped and heat embossed a few small panels using VLVS! Map Background Stamp in black and then coloured the panels with Lindy's Gang Squirt in teal colour. Then deckled & distressed the edges of these small panels with black ink. 

For the focal element, stamped & heat embossed in black the beautiful VLVS! Dancing Lady Stamp and fussy cut it. 

For the sentiment, stamped the VLVS! Be An Adventurer stamp in black onto a watercolour paper panel and distressed it's edges in black

Next, die cut a starry design die using white cardstock and cut paper mats for the card. In the end, gathered all the elements, created a visually pleasing composition and adhered everything using a strong glue. Used 3D foam tape under some of the layers to create dimension. Created white ink splatter to integrate all the elements. Finally, adhered all the layers to a 5 by 7 inch white card base.

VLVS! Supplies:


Other Supplies:

Lindy's Gang- Squirts (Polite People Purple & Loonie Toonie Teal), Autumn Maple Crimson Shimmer Spray & Black Forest Black Embossing Powder
Tsukinenko- Versa Mark Watermark Ink Pad & Versafine Onyx Black Ink Pad 
Fantasy Dies
Tim Holtz Distress Inks 

Thanks a lot for your precious time :)
Stay Blessed!
Preeti