Showing posts with label skeleton. Show all posts

Monday, October 25, 2021

HALLOWEEN CARDS by Fran

Hi everyone! Today I made a couple of cards for Halloween.  I'm not really a great fan of Halloween but seeing the great spooky work that others were doing, I was inspired!


 For the first card, I put a small moon mask on the top right of my piece of card and smooshed distress inks in Wilted Violet, Seedless Preserves and Chipped Sapphire with water.


I went round the moon mask with the darkest colour, then added more colour with blending brushes.


I stamped the cemetary stamp a little way up from the bottom in black.


For a bit of added interest I stamped branches across the moon and round the top and sides of the card using the top of a tree stamp.


After stamping the skeleton, I darkened the ground in front of the gravestones with black distress ink then used a white gel pen to highlight the skelly's bones, and the tops of the graves where I thought the moonlight would hit them.


And where there is light, there are shadows, so I coloured in some shadows with a black charcoal pencil.


To finish off this card, I mounted it on a white mat before putting onto a black card.


For the second card, I started by stamping the main image on white card, and also cut out a mask so that I could use Wilted Violet and Chipped Sapphire distress inks over it.


After removing the mask, I inked around the edge of the card with Carved Pumpkin distress ink, making the corners darker.


With a small brush, I infilled the bits that the mask covered that needed to be purple.


I then coloured the main image with Polychromos pencils


To finish the card off, I mounted it on a black card and drew round the edges with a black fine liner pen. I don't have any Halloween sentiments, so I had drew a spider hanging down (and actually wished I hadn't afterwards, haha!)


Hope you like these cards!  See you next time :)

Stamps Used:

Card 1:

Card 2:

Other items used:
Distress inks Wilted Violet, Seedless Preserves, Chipped Sapphire, Carved Pumpkin, Black Soot
Versafine Clair ink in Nocturn
White Gel Pen
Black fine liner pen
Moon mask
Polychromos pencils
Black Charcoal pencil


Sunday, August 23, 2020

Mail Art Monday Sass

Hello Again Crafty Friends!!!

Happy Mail Art Monday! 

Today I want I share some snarky I made for my brother... 
I'm sure his mail carrier will be amused...


Stamp Used- 


(the snarky saying is a sticker by Dyan Reaveley)

I hope you enjoy this fun little pair.


Tuesday, October 29, 2019

Boop! I got your nose --- by Elisa Ablett


Hey Gorgeous Stamps Groupies,

It is so good to be back creating after a short break. 
Life sometimes goes sideways and you gotta learn when to tuck and roll with it 😂💪

So to get back in the creative mood, I organised my stamps and I pulled out a few to make something for Halloween and then..... this Art Journal page fell together and it has to be one of my favourites.

Let's take a closer look !


So one of my favourite mediums to work with happens to be watercolour inks and paired with photo paper for the substrate, match made in heaven. When you smoosh, flick, drop, splatter or however you want to add the ink to your paper, it soaks right in and becomes ... permanent, vibrant colour! 

Try it today, i bet you won't be disappointed. Use stencils and waterbased ink sprays as well. All work wonders with photo paper. 

Stamp, heat emboss and fussy cut your skeleton out and put to the side. Then stamp the 'Dancing Lady' with waterproof ink, let dry and then colour using watercolours or if you prefer colour markers.

For the background, I set the 'spooky' scene by adding a landscape for the skeleton to stand on and also a crackling effect in the sky. Use Archival or Versafine black ink to stamp on the photo paper.

Add some stitching around the edges and staples for texture and effect up one side and then glue to your background cardstock and paper. 

Add your handstamped or computer generated 'quote' to finish up.

Stamps Used: - 


Other Products used: -

Photo Paper
Watercolour inks
Watercolour palette - Prima Odyssey
Sewing Machine
Cardstock - Black
WMRK Patterned Paper
Staples

Thank you for stopping by the blog today!
Don't forget to head over to the Facebook group - Viva Las VegaStamps! Groupies and add your OCTOBER entry.
We LOVE seeing what you create.
Make sure you leave some love on the Design Team Creations, we love hearing from you all x

Hugs x

Elisa 

Monday, August 27, 2018

Frightfully Fun Mail Art Monday

Hello Crafty Friends!!!

It's almost time... and I've already got the Halloween itch. 

 The chill was in the air for a few days, and that's all it took. 
(Yes, I am one of those crazy fall people, and yes I love pumpkin everything.)


Ok, back on subject.
Today I want to share a super fun envelope for mail art monday. 

Stamps Used:
Below you can see all of my base stamping.
(I stamped the skeleton family first then, masked it off.)

Next, I used Blick alcohol markers to color my base boarder. 


Next, I inked my background with Tim Holtz Distress ink in- Mustard Seed, and Squeezed Lemonade.
Then, I added some stencil details with carved pumpkin Distress ink. 
(sorry the colors are a bit washed out in this photo)


After I finished this one, and loved it so much I decided to create a few more in other colors. 
(I have a few friends with different favorite colors)


Thank you for Joining me today!!! 
I hope you all enjoy this early fall inspiration!


Monday, October 17, 2016

Mail Art Monday Spook-tackular


Hello Everyone! 

Tera here again,
Welcome back to another fun Mail Art Monday! 

Today, I want to share a super fun and easy envelope just in time for Halloween. 


To create this envelope, I started with an A2 envelope.  I started by stamping the Skeletons in the closet stamp.  I next used a ruler to continue the line for the "base board" to create a floor. 

Next, I stamped the spider and web in the upper right corner. I used my micron marker in .005 to create the cracks in the "wall".

To color everything I used a variety of zig clean color brush pens. and distress inks to add a bit of shading around the edges. 


Thursday, September 01, 2016

September Challenge

It's MONTHLY CHALLENGE time! I love September because the weather starts getting cooler.. the leaves will change.. and HALLOWEEN is right around the corner. I LOVE HALLOWEEN! 

VLVS! loves Halloween, too :) Have you seen our Halloween stamps?!

Well that brings me to this month's challenge...


HAPPY HALLOWEEN! 

We are jumping right into the season and would like to inspire you with words like : bones, skeletons, garden gnomes, nymphs, goblins, ghouls, bats, creatures, critters, vampires, graveyards, catacombs, dead, death, halloween, spooky, creepy, and more.

Don't forget the rules:
-Create a new project based on our inspiration board (it has to be posted this month, but you can certainly link up to other challenges as well!)
-Use at least one (but certainly more if you want) Viva Las VegaStamps! rubber stamps
(We are now allowing competitors stamps to be on your work, but please make VLVS! the focus of the project, thank you.)
-Post it to your blog with a link back to us
-Upload to our linky using your direct blog post link (You may also upload via facebook, flickr or other gallery)
You could win a Project Spotlight post on our blog + some new rubber of course.
And visit us back here for inspiration!


Monday, September 07, 2015

Mail Art Monday Spooktacular

Hello again!!!

Its me Tera here with a new spooky take on our Mail Art Mondays! 

(also Happy Labor Day!)


This  time I want to share a piece to get you ready for some fun Halloween mailing!!!
(Who doesn't want to scare the mail carrier every now and again!?!)


Stamps Used:

Bell Jar 3 x 4 3/4


Thank you for stopping, Stay Inky!!

Friday, October 18, 2013

Haunted Seas

I started with one idea, switched to another and then went back to my original idea.
Together, they add up to Haunted Seas! Jack Sparrow would be right at home.

(Click to see larger! such gorgeous detail!)

Supplies
VLVS Stamps Used:
Skeleton Mermaid - Item 19257 Plate 940
Lighthouse Scene  - Item 19125 Plate 923
Cray-Pas® Expressionist® - Orange , Pale Blue, Yellow, White
Gellyroll Stardust-Lime-Star, Golden Star; Metallic Green, Purple; Standard-White

Masonite Panel
Silk Tissue Paper
Ranger Archival InkPad: Jet Black
StazOn Inkpad: Jet Black
Golden Fluid Acrylic paint: Micaceous Iron Oxide
Golden Soft Gel medium
Golden Self-Leveling Gel
Ranger White Enamel Accents
Clay-shaping tool
Plastic eraser
Hairspray

I prepared my wooden panel by priming it with Micaceous Iron Oxide, an acrylic paint with particles that produce a dark surface with a fine tooth, and sparkle.  It's a good surface for pastels, and light on dark painting.


I used the oil pastels to paint a moonlit ocean.


I sprayed the piece with hairspray to set the pastels, and left it to cure overnight.  Hairspray is not a permanent fixative, but it will help keep the oil pastels from smearing when you put on gel medium for a more permanent seal.

At this point, I started working on another project.  A few days before I had poured some Golden self-leveling gel onto a craft mat and left it to dry into a 'skin'. 


This medium takes quite a while to dry--a good 48 hours here, with the weather we're having.  Others times it dries faster, but I usually plan on at least 24 hours.  The medium dries clear, and peels right off the mat.


I poured out a fairly large amount and stamped several images onto the dried skin.  Including one of a lighthouse.  As I was cutting the images out, I had the thought that the lighthouse would look pretty good on my moonlight ocean.

It did--but the shading was wrong.  Now the skin is clear and I could flip the piece using either side.  That's one of the reasons for stamping onto the dried gel.  You also get some depth.  But when I flipped the image to get the shadows right, it didn't fit properly.  I compromised.  I just placed the lighthouse skin onto my scanner and lay the oil pastel painting on top.  Now I have a scan, incorrect shading and all, but I still have the painting free for my original project, as well as the lighthouse skin for yet another project.

I stamped my skeletal mermaid onto silk tissue paper, colored it with the gel ink pens.  Then I cut it out and used soft gel medium to glue it down onto the oil pastel painting.  I let that dry and then coated the whole piece with more soft gel.

For a last touch I added the seafoam with white enamel accents.

Thank you for stopping by, and I hope you've enjoyed sailing on Haunted Seas!For more of my work with Viva Las VegaStamps!, Amazing Mold Putty, zentangle-inspired art, and daily links to tangles, tutorials, and giveaways please visit my "Life Imitates Doodles" blog.   ~ Sandra Strait

Helpful Links: VLVS! Store for all your stamping needs; the  VLVS! Blog for new projects; VLVS! on  FaceBook,  Pinterest and Twitter

Friday, April 26, 2013

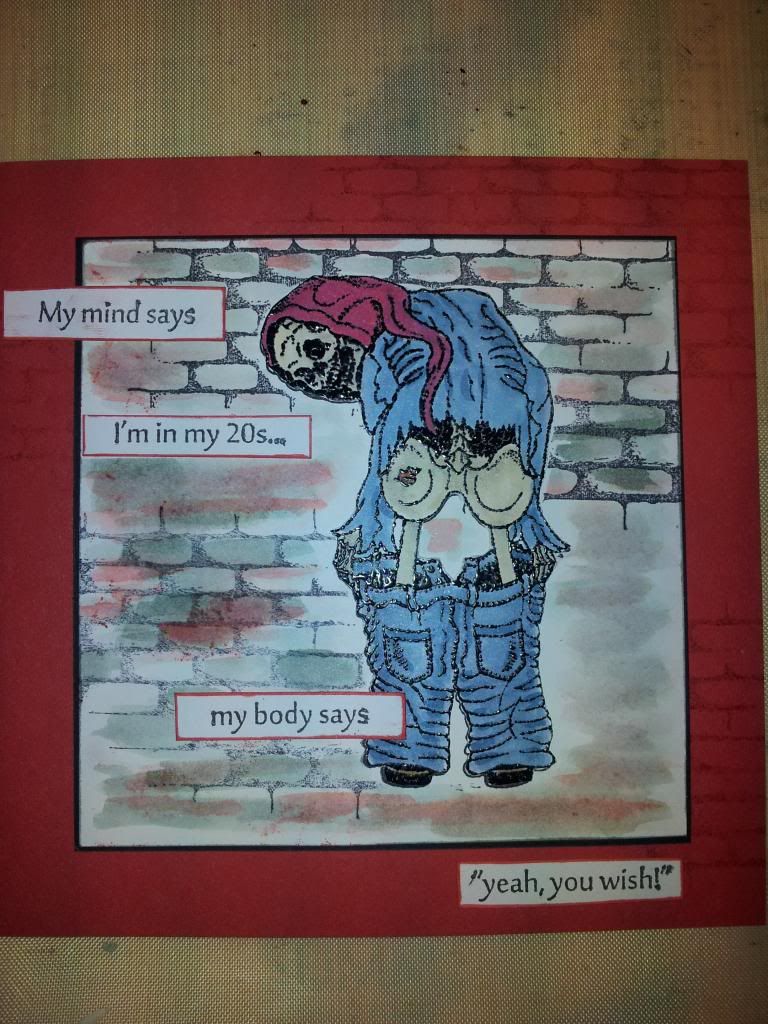
Our April Guest Desinger.... WILLY!!!

I apologize for the Blogger nonsense earlier.. 

I thought it only right to introduce Willy in a brand new blog post!!

We're so excited to have her humor today!!
 
 "Hi there,
My name is Willy de Bruijne and I live in the east of the Netherlands. Since a copple of years totally hooked on rubberstamping, paper and mixed media. Just often missing free time...

Willy has brought us this card today :


Here is a how to on building this funny from Willy:

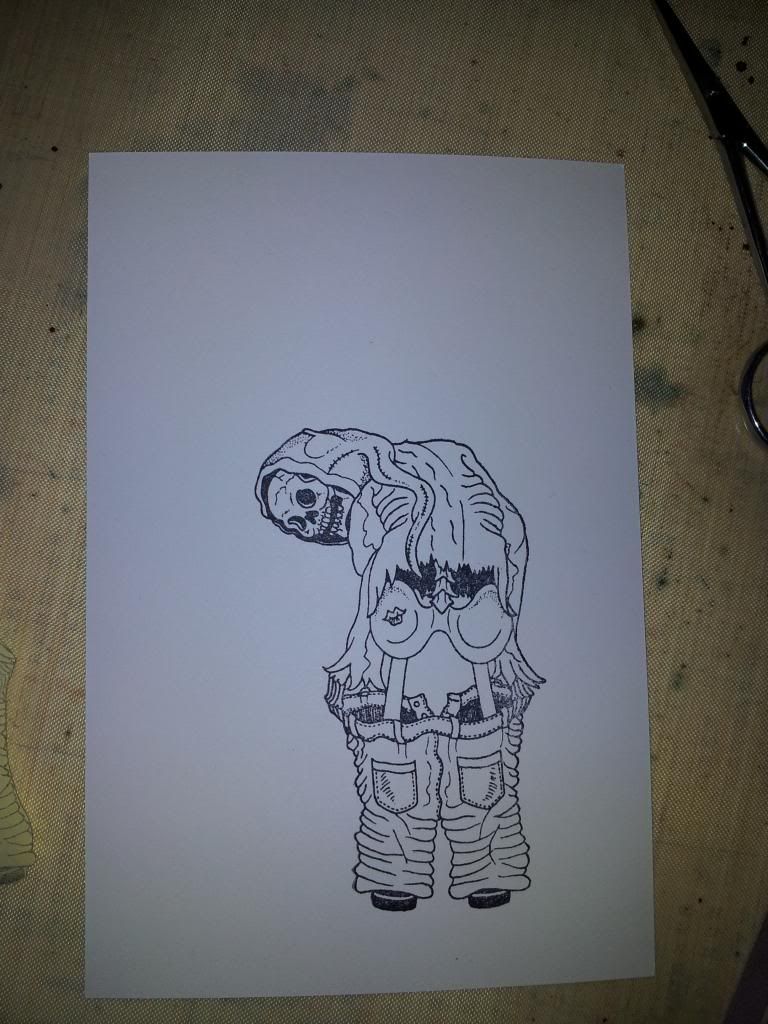
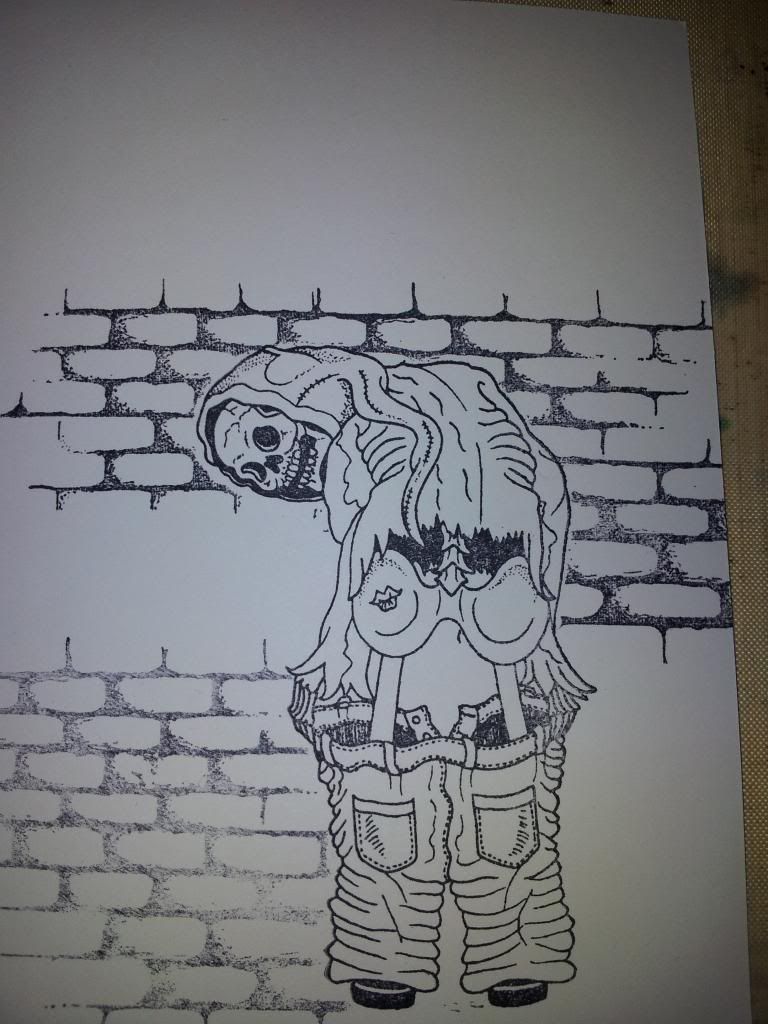
1) Stamp the Mooning Skeleton item 18810 with distress ink and emboss it with black powder.
 
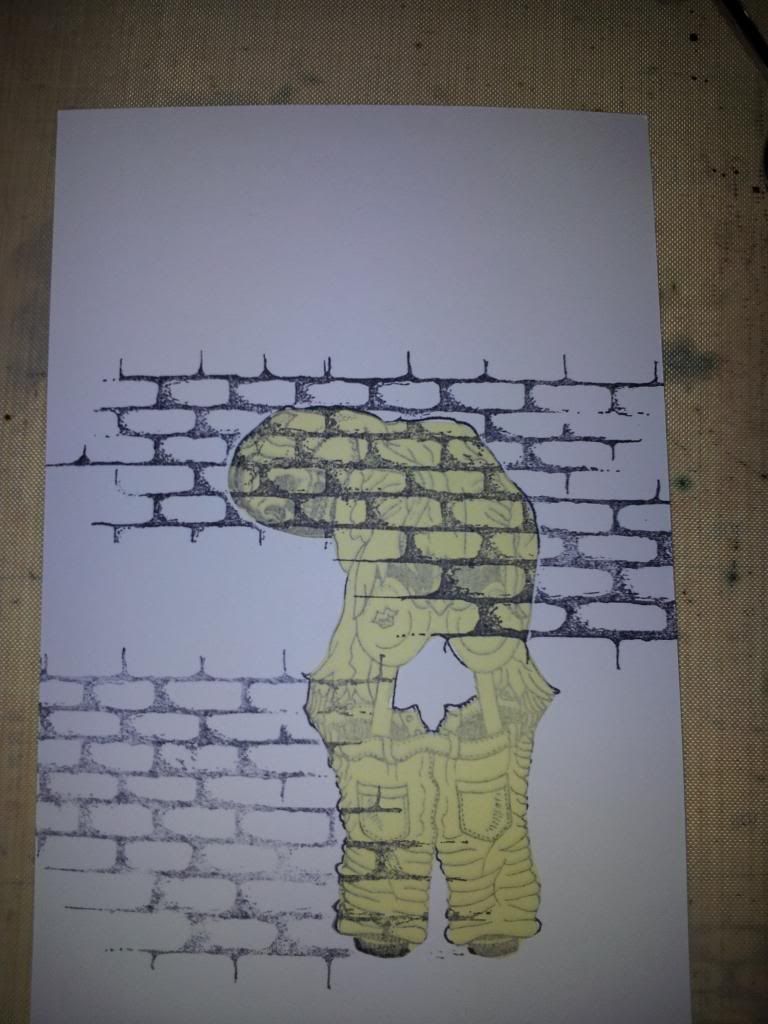
2) Make a mask
 
3) Stamp the Brick Background item 19077 2 times
 
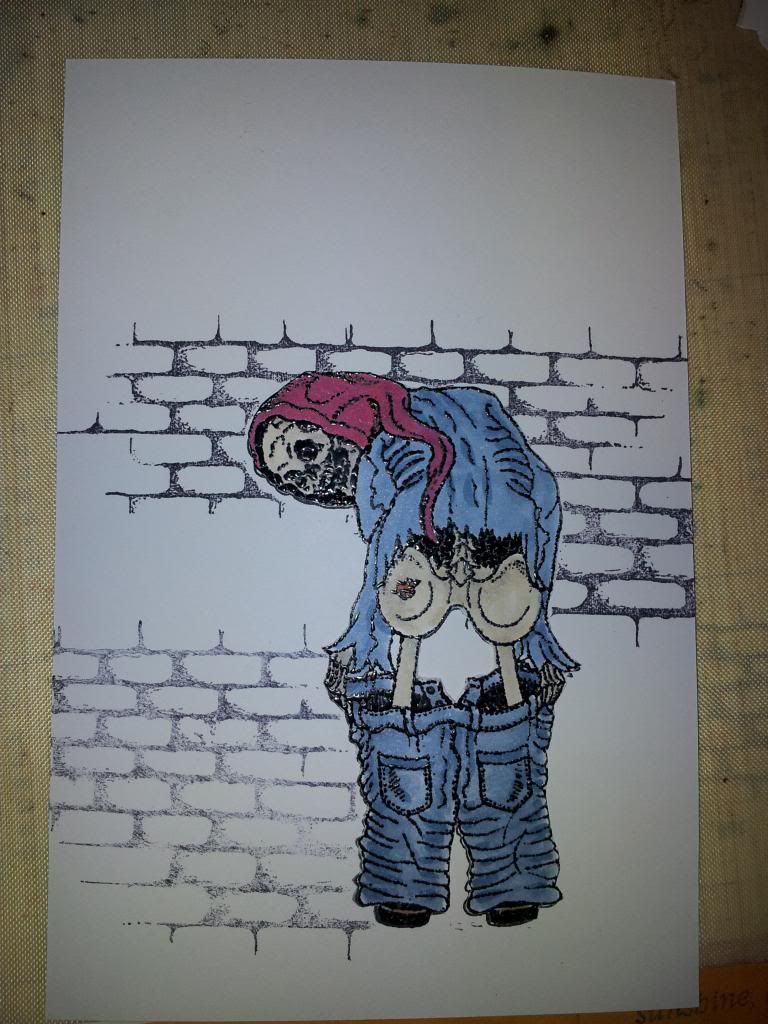
4) remove the mask
 
5) Color the Skeleton with copic markers and color the background with distress ink. Finish with My mind says stamp 18773.
 
I love the how to and the use of the masking on this piece.. Thanks so much for stopping by Willy!!!
 

Friday, October 26, 2012

Fan Feature + Free Shipping!!

Morning stampers!!

I thought it would be nice to share some Fan Features with you again, today.
We really love seeing our products in use and are so thrilled each and every time someone shares a project with us that shows off our wonderful stamps! So don't forget to share them on our facebook wall!

Today I'm sharing projects from TWO fans... 


Michele has done not only one, not only two.. but SIX Cards using our Butterfly Spotted.


and this tag

is by Gerrie, who won during our Halloween Blog Hop!! She put together this tag using our Tree Background and Giant Head Skeleton which can be found on plate1433.

Thanks for sharing, girls!!

Don't forget about our free shipping... FIVE DAYS LEFT!