Showing posts with label fairy. Show all posts

Tuesday, August 12, 2025

Fairy by Tracy Blackwolf

 Hello everyone,

I did a tag today , I hope you get a good laugh.


For the background I used a combo of kaleidacolor inks and distress spray stains.
For the wings I used effect paste-phoenix by Finnabair . Sadly it just doesn’t photograph well. It has a lot of fire and is really pretty.


The final touch was using orange glitter glue on the dragonfly wings. A fun tag.

Stamps used:
Large fairy  18493
I may be fat…. 147
Dragonfly     9830
Wildflowers    18819
Grassy dune.     9871

Other supplies:
Effect paste phoenix by Finnabair
Distress spray stains
Kaleidacolor ink pads-baby powder, fresh greens


Monday, February 24, 2025

"WELL, IT WASN'T ME...." by Fran Chalmers

 Hello everyone!

I've made a postcard for you.  Must admit, I was giggling to myself while making this! I hope you like it.


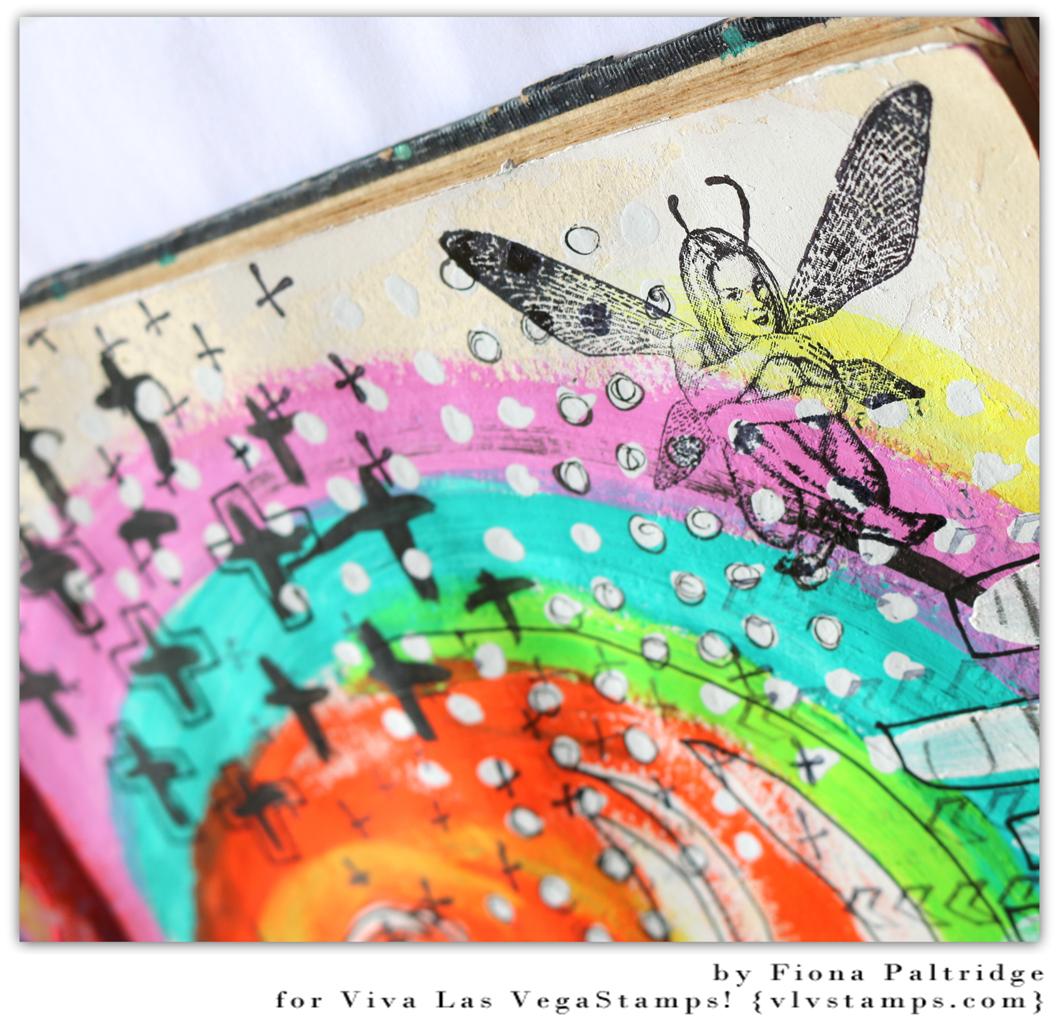
To make the background I smooshed together Distress Inks in Wilted Violet and Picked Raspberry with water.


I then added a bit of texture in the background with just one stamp, in Versafine Clair Hawthorn Rose.


I then stamped the images on thick paper, coloured them and fussy cut them out (leaving off the antenna!). I then stuck them onto the background.


I stuck on my sentiment and went round the edges with a black fine liner


I put some Stickles onto the fairy wings to make them sparkle.


Items Used:

Stylized sun 2127

Fairy 18694

Girl with wings 19005

Other Items Used:

Distress Inks in Wilted Violet and Picked Raspberry

Versafine Clair ink in Nocturne and Hawthorn Rose

Memento ink in Tuxedo Black

Copic Pens

Black fine liner

Stardust Stickles


See you next time :)


Tuesday, June 19, 2018

I Hope You Know... | Sue Plumb


Hi everyone!
Sue Plumb here to share my latest VLVS design team project with you. Following on from my previous post a couple of weeks ago when I shared an art journal page inspired by the June Monthly Challenge; I was inspired to create a full 12x12" scrapbook page that incorporated some of the same design elements. (If you missed it, you can see my art journal page here.)


I began my page with a sheet of white cardstock and stamped out my background design using Staz On ink. The first stamp I used was the Tree of Life - Tree with Roots (which is also the main inspiration image from this month's challenge). I added some variety to my "forest" by also using the Weathered Tree stamp. Besides stamping the full image, I used the very tops of the branches in various places to add depth.


For my foreground I used the Smear/Smudge stamp and repeated the image several times. Then it was time to add some colour. 


I wanted to keep the colour soft and subtle, so I used Faber-Castell Gelatos and applied the colour by scribbling onto my messy mat and then I picked the colour up with the tip of a water brush and applied it to my page, blending as I went. I started in the centre of my page and worked my way out towards the edges.


After I had the colour completed, it was time to add some more details to my page. I used the new release I Hope You Know quote stamp in the bottom left corner of my page and balanced it out by adding the Flock of Geese in the top right corner. 


I also added the Tiny Moon from the new release Plate #1500 to the sky.


I added a little more detail to my foreground by lightly stamping with my fave Doodle Dots stamp.


With all of my page background complete; I then added the photo of my children, which I mounted up on some cardboard to help it pop and then adhered to the page using Miracle Tape.

To finish my page I wanted to add a little touch of magic, so I took a sweet image I had pre-stamped onto some tissue paper using the Fairy stamp. I applied the image to some cardstock using gel matte medium, then brushed on a little colour using the Gelatos again. I then trimmed the fairy and adhered the top part of her so that she appeared to be hiding behind the log in the photo, bending her wings up from the page to add a little dimension. I also added some messy white cotton thread for a little texture. 


Don't forget to enter this month's challenge, you can link up your entry via this post HERE before the end of the month. You could win a spotlight on the blog AND some new rubber! 

Thanks for stopping by so I could share this with you. I hope I have inspired you to get inky too!


Stamps used:
Fairy

Other materials:
- American Crafts cardstock
- Staz On ink
- Faber-Castell Gelatos
- tissue paper
- gel matte medium

Monday, November 06, 2017

A Rainbow Page by Fiona

Hello my VLVS fanatics!! Fiona here with you today to share an art journal spread i created using the gorgeous VLV STAMPS!!!


Nothing like a bit of rainbow to brighten your day!!! This page came out of me just wanting to use very tube of paint I had!!! Because I just love colour and I can never decide on just two or three!


The swirls were simply created with a paintbrush. And then I added my own doodling once the paint dried. To finish it all off I embellished the pages with some of my favourite VLVStamps!


And the cutest saying ever ..... "If i was a bird, I know who I'd poop on!" LOL
I've wanted to incorporate this little phrase into one of my art journal pages for some time now... this one seemed to fit!


And of course I had to add this adorable little fairy. I just love her sassy face!


Viva Las vegastamps! used:

Can't wait to catch you all again very soon xx


Thursday, April 04, 2013

Moon Enchanted

HI! My project today is one of my favs, i made a whole card set which i will share my over my next few post.

The one today is

Pretty Moon and Fairy stamp, along with the Enchanted Stamp.

Here is the link to the "Fairy on Moon" and to "Enchanted".

The background was made using 140lb watercolour paper using ShinHan Tube Watercolous.

Using a wet brush cover the entire piece of paper, let it sit for just about 45 seconds and then dip your brush into the watercolour and begin dropping colour onto the paper. Letting the watercolour paints fluidly move and blend.
I then stamped my chosen stamps using Stazon Ink.
I then used my prisma coloured pencil to add shadows and colour to the card.

Honestly stamp art is easy, just have fun and play!
L. ANg

Friday, June 24, 2011

Blinging It Up!


I have had this Fairy Paper for a while now and thought that the 1 3/4 X 2' Fairy On Mushroom Stamp from Viva Las Vegastamps! would work with it nicely. You can view that individual stamp HERE. I decided to use a combo of craft markers and pens including gel pens, CM Markers, and a few ZigZag/Bargain Bin ones. This paper is textured and has some sparkle to it but I wanted to add some more BLING to it too! I used Sticko Gems. The punch I used was Fiskars. Ever since I have been ordering from VLVS - I have been ordering the UNmounted stamps...because you can really stretch your dollar(s) much more by doing this! The more rubber stamps the merrier! They take up less room in my stamp drawers, too! More stamps...more storage space left over! LOVE IT!

The 29th!!
What's so important about the 29? VLVS is having a blog hop! You won't want to miss it and if you leave comments on each one of the DT Members blogs, you'll be entered to win some of your very own VLVS stamps!

Please swing by my blog anytime!
http://blissfulplace.blogspot.com