Showing posts with label Ranger Distress Ink. Show all posts

Sunday, July 12, 2020

Mail Art Madness

Happy Mail Art Madness...

Oops, I mean Monday.... 

(or do I? I just started Keto on Thursday, so I'm definitely feeling some madness cutting my favorite food group ...carbs <3)


Stamps Used:


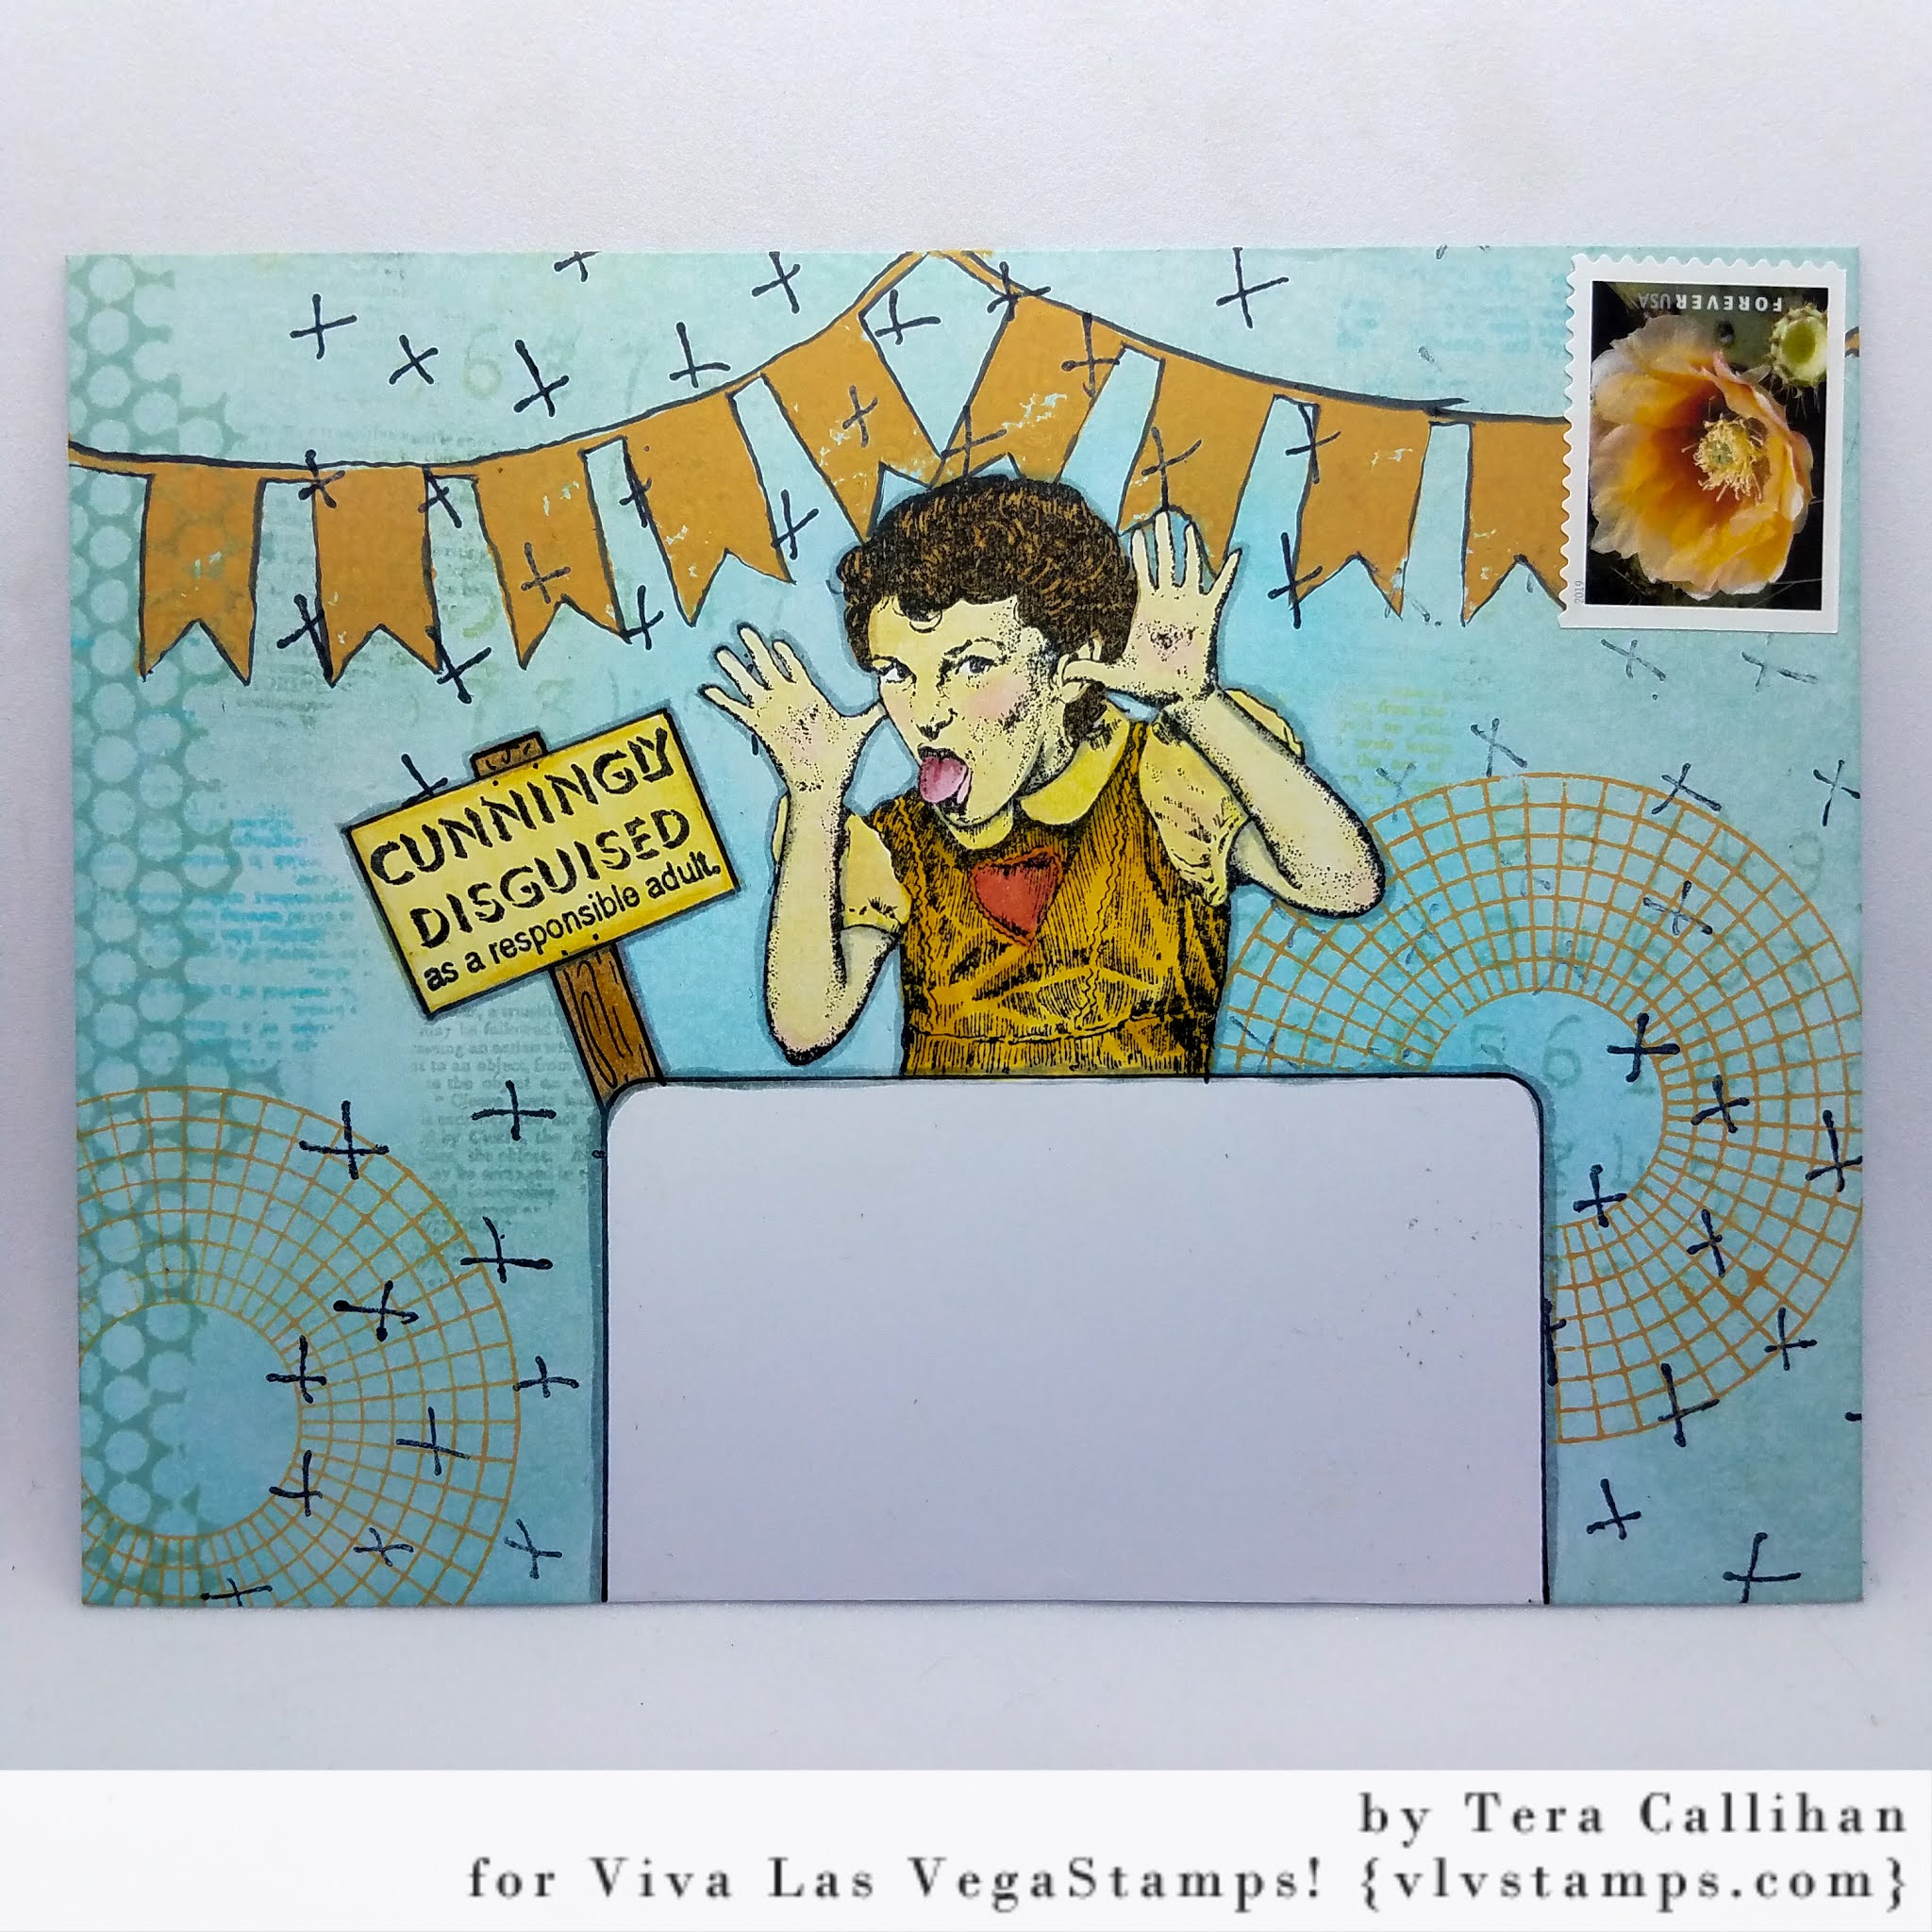
I started by stamping "Girl making face" and "Cunningly disguised". I then drew an address block, and a signpost to hold the quote.  With the base started I then masked off the main images.


Using a combination of Distress inks in: Speckled Egg and Tumbled Glass (both oxide and originals). I then added a layer of ink over everything , and began adding background detail stamps.


To add depth I stamped my cross marks in black archival ink. 


The banner was stamped in "Spiced Marmalade" Distress Oxide ink


With the same ink I used for the banner I stamped the color wheel lines, then removed my masks.


I just love the reveal after all that inky madness...
To finish I colored my focal images, then found a matching postage stamp to tie everything together. 


I hope you have enjoyed this little tutorial and bit of sassy mail art!!!

Friday, September 14, 2018

Beware of...

WOW!  September already and you know what that means???  My favorite card making season is upon us!
Michele here today and I LOVE making Halloween cards!!!
I am sharing one today using some new images from the last release.


Stamps used:  Raven Looking Up, Bats Over Moon, Beware Of, Cross Marks Background, Row Of Numbers.


My background is Distress Ink blended with a Nuvo blending brush (may favorite new blending technique) and splattered with water.  This is over the background stamps heat embossed with Ultra High Gloss Embossing Powder.


I absolutely LOVE the way water reacts with Distress Ink!!!


Perfect sentiment right??!!


I was also inspired by this months inspiration challenge.  You can find more info on that here.

Be one the look out for more Halloween goodness coming you way soon!!

Until next time... get inky!!

Thursday, August 30, 2018

Thank YOU!

Hi ALL!
Michele here today with a thank you card...I celebrated a birthday recently so I had several to send out.  I still LOVE sending out thank you cards with special notes in them!  It is so much more personal.

OK, let's jump right in!


Stamps used:  Harlequin Diamond Background, Thank You, Creepy Creature Sitting.


I brushed Distress Ink in Broken China with the Nuvo stencil brushes, over the stamped background and then spritzed with water for some watermarks.

The creature is colored with Prisma Colored pencils.

I am off to write some special notes in my cards...
Until next time...get inky!

Tuesday, October 24, 2017

Trick or Treat!

Only a couple more days until all hallows eve...do you have little trick or treaters dressing up this year??
Michele here today with a Halloween shaker card!!


These two stamps work perfectly together for this haunting shaker card.  I used The Moon and Kids in Costumes Silhouette.

I stamped the moon on transperancy to create the shaker part.  I used beads, sequins and Um Wow Studio star confetti in the skaker that I build up with a sheet of foam with a circle cut out to match the size of the moon.


Some awesome Brusho in yellow ochre colors the moon and distress ink stormy sky and blueprint sketch creates the night sky.


A bit of fussy cutting around the kids and a haunting we will go.


I stamped in archival ink which worked great on the transperancy.

And there you have it! 
Until next time...get inky!

Friday, October 06, 2017

Halloween Cards

Do you send Halloween cards???
Michele here today and I have to say that Halloween cards are my FAVORITE to make!!!

I have a couple to share today.


Stamps used:  Rats in Pumpkin, The Moon, Something Wicked, Doodle Dots.


Stamped in archival ink, colored with Prismacolor pencils.


Background in distress ink.

These next two cards have background down with Distress Ink also.

Stamps used: Dracula, Full Moona Haunting we will go.


A little bit of coloring on this one too!


Stamps used: The Moon, Stitch Mouth Face Silhouette, Stay Creepy.

And the last one for today is a little cuter...


Stamps used: Sitting VooDoo Doll, I Put a Spell on You, Striped Witch Hat.


Some more coloring with Prismacolor pencils.

Let's see what you are creating!!  Share in our Facebook group, The VivaLasVegaStamps! Groupies.

Until next time...get inky!

Thursday, September 28, 2017

It's Time for Halloween!!

I love Halloween crafting!!! 
Michele here today and I am sharing two Halloween cards with a little masking how to.

Let's jump right in...


I started by stamping the image I wanted inside the bell jar, in this case a little skeleton from the latest release.


I stamped the image again on an old dictionary page and cut out the base to place over my stamped piece.


Then I stamped the bell jar ove the skeleton.


Oh, it is just the best and easiest masking technique!!


I did the same over the entire bell jar so I could ink and stamp the background.

A little bit of coloring to finish it off.

Stamps used:  Skeleton on a Pedestal, Bell Jar, Cross Marks Background, Spooky, Raven in a Witch Hat, Spider on a Web Line

I had so much fun with the Bell Jar stamp I did this one too...


Stamps used:  Bell Jar, The Head Figure by Cat Kerr, Specimen, Humerus Bone, Harlequin Diamond Background

Can't wait to see what you all create for this Hallows Eve!

Until next time...get inky!!

Wednesday, December 02, 2015

More mailart !

Hello everyone,


It's my turn to try and give you some inspiration for the new Challenge. I have to say that I had a little trouble with this one as red is really not my colour. So this mailart piece you see here is actually my second attempt. The first one ended up being torn up and thrown away... So here it is:


It is based on this inspiration board:


Words to go with this board:  red, stripes, cream, white, christmas, mail, mail art, stamps, letters to santa, glitter, handmade, diy, santa, belts and belt buckles, wishlist, etc. 

I really like this inspiration board but as I said I don't really like using red and I hardly ever do in my crafting. But for this one I took a white envelope, masked off the address area and sponged the red stripes on it with Distress Inks and a blending tool... I used Barndoor and a bit of Fired Brick at the edges. Next I stamped the stitching around the address area and typed the address with my old typewriter. I then looked for a suitable postage stamp and found this one in my stash. Yes, I do collect stamps but only to use in my crafting ! Next I stamped the "Tis the season to be jolly!' around the edges (part of a stamp;  and yes, I cut it up; a full list of stamps used is at the bottom of this post), the deliver to and the staples on/off the postage stamp. The last think I did was stamp the little girl without her crown, drew the Christmas hat on her head, coloured her with Copic Markers, cut her out and adhered her to the envelope. 

I used the following stamps:


Thank you so much for stopping by today and I hope you will participate in our challenge this month! 


Thursday, February 12, 2015

With Love.

Hello, Mary here, to share a sweetly stamped Valentine I've created for my Sweetie.


For the background, I've just inked it up with Distress Ink and water and then stamped the Medium Doily slightly off the edge to add a bit of interest.


To complete my background, I then stamped the Heart Outline nineteen times---one for each Valentine's Day we've spent together.  A quick dusting of Perfect Pearls adds a touch of sparkle without any glitter to flake off.


I then stamped Young Love and colored them up with my Copic markers.  These cuties look like the Campbell Soup kids from days gone by and SO remind me of my husband in his baby pictures!  A bit of fussy cutting and I glued the image down.


To finish off my card, I've stamped the {With Love} sentiment and stitched on a few vellum hearts to add a bit of dimension.  I love how you can still see the background and hearts through the vellum.

Thanks so much for stopping by today.  Now, go grab your favorite rubber and make something sweet to give this Valentine's Day!!