Showing posts with label 19644. Show all posts

Friday, February 21, 2020

If this is reality: Negative Hearts

hi Everyone...
I know it's Late in the MONTH but here is my take on the February Challenge
Negative Hearts
check out Facebook and #feb2020
for a chance to win a Pound of Rubber 
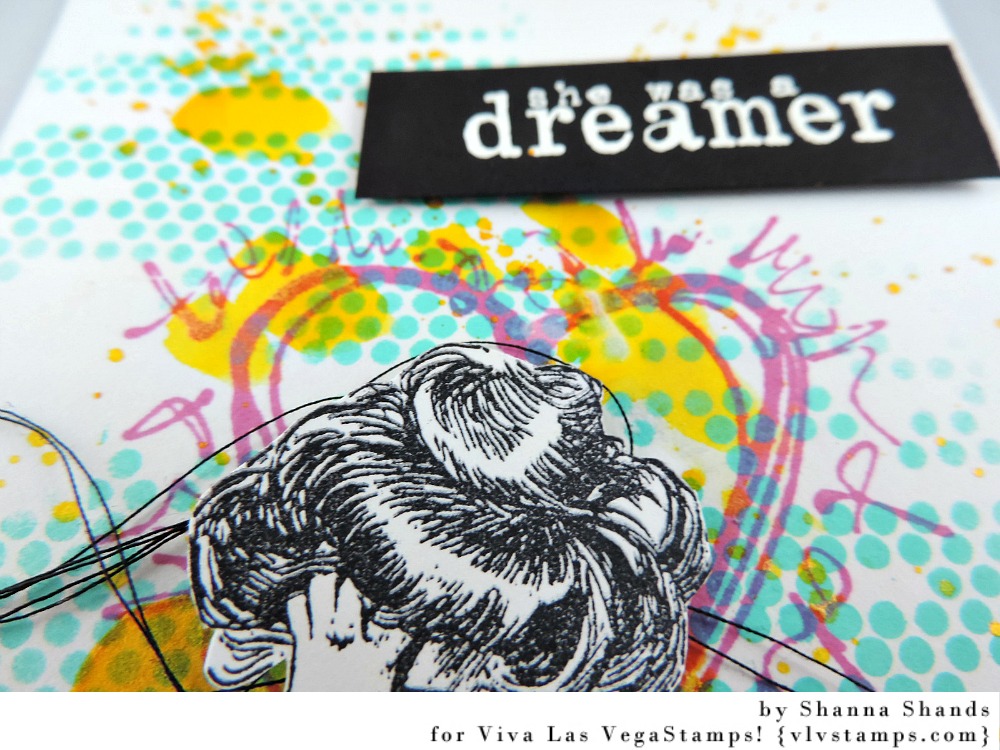
 I started off in my junk journal. I used a brayer to add some white to make a grounded and uniform area to start.... I then added some water and Lindy's Magical Shaker: Autumn Maple Crimson
then I stamped on the Banksy Not my Mother stamp, added the wings and then I used a pen to "join" the wings to the Figure... 

 Added the Squiggle Heart with Distress oxide: Lucky Clover

I then went over it the squiggle heart with stazon black again. 
the heart and wings and Part of Diana's dress were then coloured with some more Lindy's shaker.
Finally I stamped the quote on a piece of paper and then coloured it, like the background piece.

so here you go..
the finished product.


VLVS! used:

If This is Reality (sku: 19884)
I Am Banksy's Mother (sku: 20448)
Squiggle Heart (sku: 19644)

Other Materials Used:

Junk Journal
Lindy's Magical Shaker: Autumn Maple Crimson
Ranger: Tim Holtz Distress Oxide: Lucky Clover
Dina Wakley Media: Ocean
Stazon Jet Black
Stencil Girls Stencil

Live with Respect
xoxo


Monday, February 03, 2020

Two Valentine's cards in one with Josefine

Hello everyone! This is Josefine and today I wanted to share an idea for quick Valentine's cards (since it is close to the 14th and such).

I started by creating two card bases. In my case these are 7"x3.5" (folded), but any size would have been fine. I then stamped the Squiggly Heart with a light grey ink. For this technique, I used my Misti stamping tool, because I will stamp that heart a couple more times onto the same spot, and the Misti allows me to do that.

Next, I needed a bit color - pink shades, of course - and instead of just applying it, I used my smallest Gel Press and mono printed the paint on top of the grey heart. My goal was to add only small spots, so I didn't press the paper entirely onto the Gel Press but dabbed it onto small areas instead.

Nest, I lined up the card base in my Misti again and stamped the heart in a dark black.

Now I fuzzy cut the inside of the heart.

I'm not using the cut out for this project, but I kept it. You never know.

Then I used the card base with the cut out heart as a stencil. I put another card base (in the same size) underneath the original one and blended some more ink shades on top.

This way, I now had a wonky heart on the second card base and just had to stamp the heart one more time. Again, easily done because I just had to align it on my stamping tool.

And here are the two cards I made. One is a see through card (I'm thinking about adding a picture in the middle here). The other is a one-layer card with a sentiment on top. And both together make two quick and simple Valentine's card - two in one ;)

Stamps used:

Thanks so much for stopping by. I hope you liked my two quick cards and now have a good idea for some quick cards - in case you still need some.


Have a great week.
Josefine

Friday, November 29, 2019

Pair of Cards by Preeti D.

Hi friends :)
Hope you are doing well.
Preeti Datta (Dutt Preety) here from the VLVS! Design Team. 
For today's post, I've created a Pair of Simple Cards. 
I've used some gorgeous VLVS! Rubber Stamps here.
I've done watercoloring using Zig markers and created white ink splatters on these cards.


VLVS! Supplies:
Other Supplies:
Kuretake: Zig Clean Color Real Brush Markers
Canson: XL Watercolour Paper
Tsukineko: Versafine Onyx Black Inkpad
Winnie & Walter Essentials Cutaways 

Thanks a lot for your precious time :)
Stay Blessed!
Preeti

Friday, July 26, 2019

Trio of Cards by Preeti D.

Hi friends :)
Hope you are doing well.
Preeti Datta (Dutt Preety) here from the Guest Inspiration Team. 
For today's post, I've created a Trio of Cards using some gorgeous VLVS! rubber stamps. I always need greeting cards to give to friends & relatives, so it is a great idea to have a stack of them ready for whenever the occasion calls for it :) 


I stamped the beautiful focal images (using VLVS! awesome stamps) onto watercolour paper panels & did watercoloring within the focal images. Then, loosely watercolored in greys around the focal images to create depth.


I created a grungy background by second & third generation stamping with VLVS! sentiment stamps around the focal images. And to create an artsy look & frame the pieces, I loosely stamped the Sawtooth Stitching Lines Stamp around the panels.


 In the end, the watercolour panels were adhered to A2 sized grey card bases & I added a sentiment sticker to each card. 


VLVS! Supplies:


Other Supplies: 
Kuretake: Zig Clean Color Real Brush Markers
Canson: XL Watercolour Paper
Tsukineko: Versafine Onyx Black Inkpad
Winnie & Walter Dies
Lawn Fawn Dies 

Thanks a lot for your precious time :)
Stay Blessed!
Preeti  

Tuesday, May 26, 2015

She Was a Dreamer

Hey everyone. Shanna here with a fun take on a mixed media card. 


I wanted to play with some bright colors and some new stamps and I thought I would love to share with you how I created it. 


I used some paint and a stencil for the first layer on watercolor paper.


I then stamped the Squiggle Heart - 19644 with Magenta Archival Ink. 


Then I stamped the image Fed-up Vintage Lady - 19640 on some white cardstock and cut her out. 


I wanted to add a sentiment to the card, therefore I wanted to emboss and add more pop of color. So I grabbed some black cardstock and white embossing powder. I used some Versamark Ink to add the embossing powder. 


After that I wanted to add a little more pop of color. I used Twinkling H20's color Mango Mamba. 


I threw everything together and tucked a little thread behind it using chipboard to give some dimension to everything. 


Items Used: